Data Input / Output and JUnit
[Practical 8 of 11 - Part 1]
Creating the Class Structure:
Create a new project in Netbeans called FileInputOutput of a type Java Class Library. Right click on the Source Packages select New and from the drop down list Java Package.... Give the new package a suitable name, since we are studying this course at Leeds University lets use our web address as the prefix, so the full package name should be uk.ac.leeds.filereader.
Right click on the new package and select New and this time select Java Class... from the drop down list. Call the new class CSV.
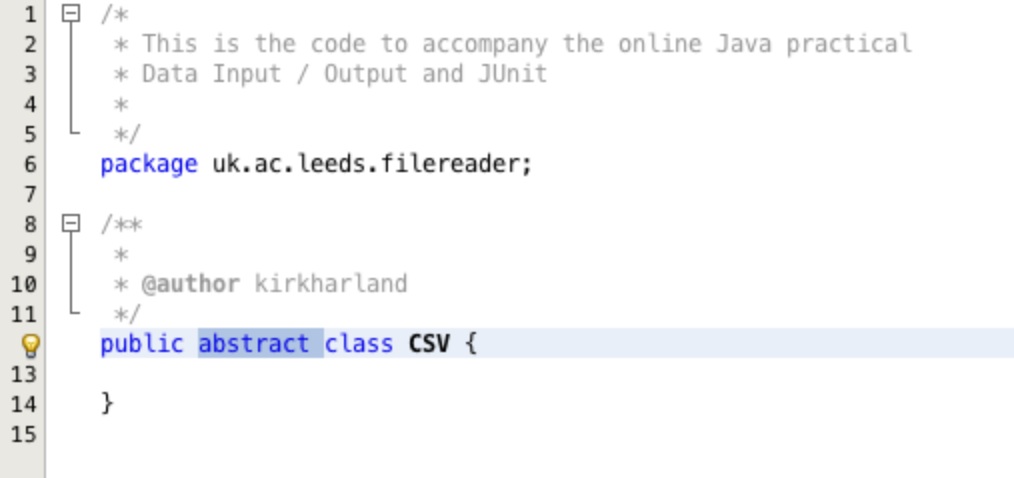
We are going to make our new class abstract because we don't want anyone to try and create an object from it on its own. We are also going to extend this class to provide functionality for both loading and saving files.
Before the keyword class insert the keyword abstract as shown in Figure 1.
Next we are going to create two more classes extending from CSV called CSVReader and
CSVWriter. Create the two classes by right clicking on the filereader package and
selecting to create a new class twice giving each class the appropriate name. Now we edit the class declaration
to make the two new classes extend from CSV.
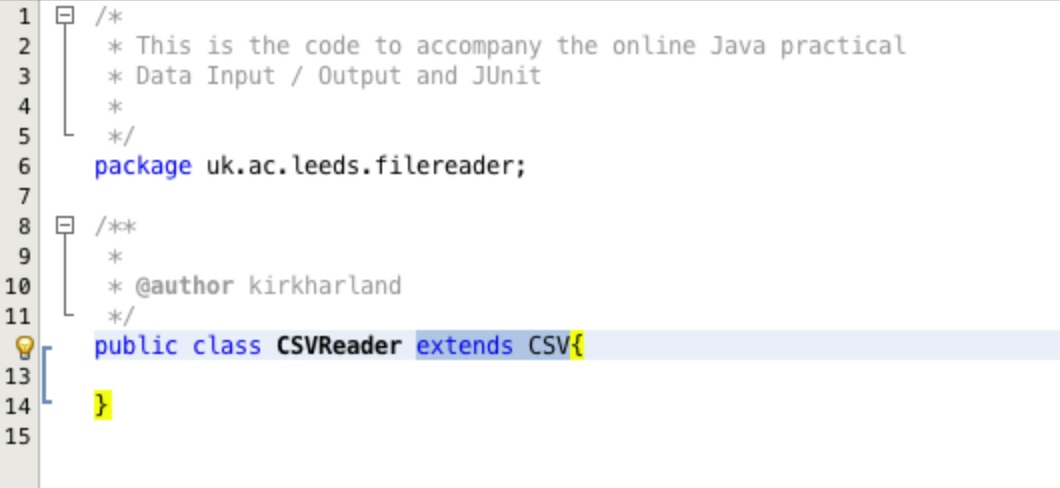
CSVReader class. Edit the class declaration appending the keyword extends and
the name of the CSV class as shown in Figure 2.
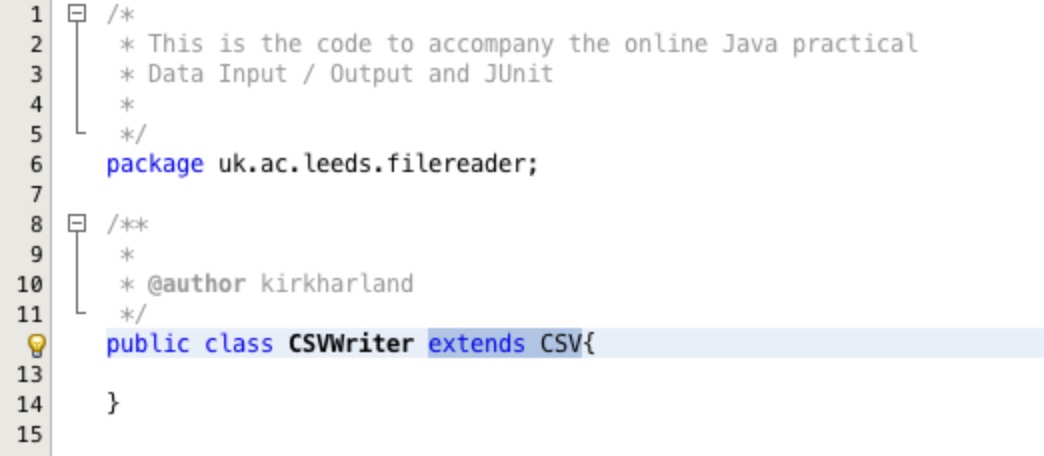
CSVWriter class as shown in Figure 3...
Now we need to think about the methods that we will need.
For the CSVReader we will need a method to load a file and one to parse
each line of the file into the different fields of data. We will also need a method to access the data.
For the CSVWriter we will need a method to save the data and a method to construct the lines
to be saved.
So lets create some empty methods in our classes.
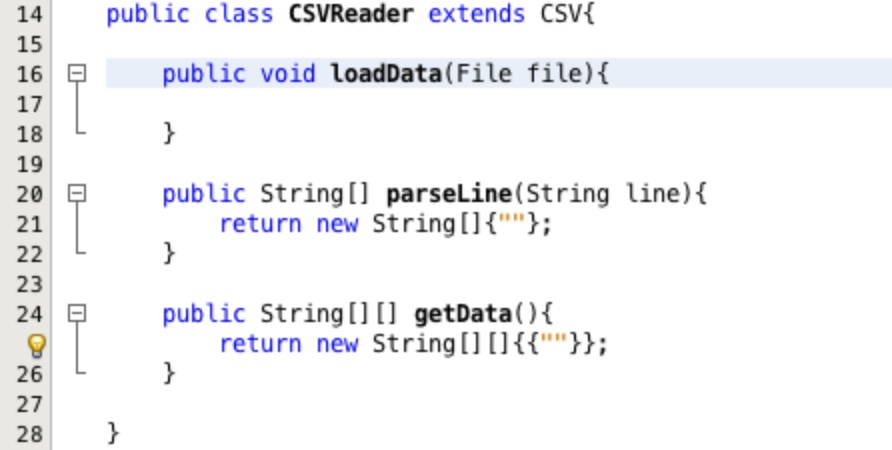
First the CSVReader. Create three methods using the lines:
public void loadData(File file){}public String[] parseLine(String line){}public String[][] getData(){}
Your class should look something like Figure 4.
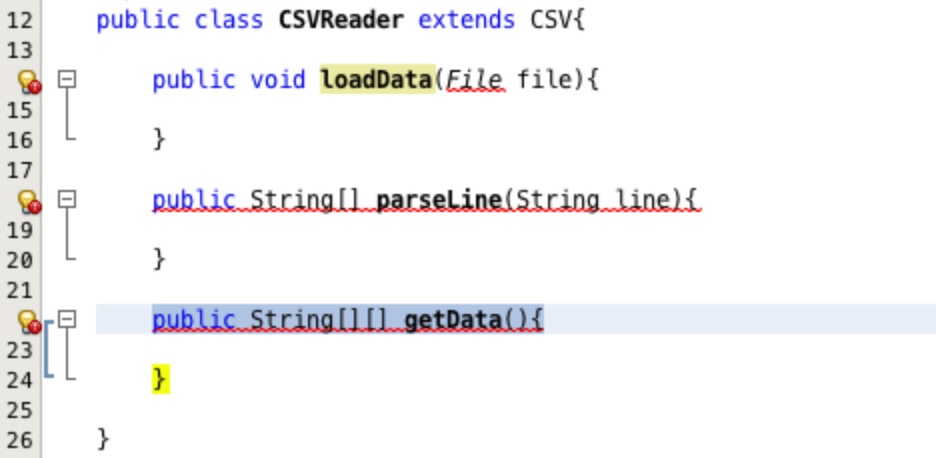
The two compile errors we see on the parseLine and getData methods
are because they have a return value but are not yet returning anything. This is to be
expected.
We can temporarily return empty values to remove the errors. Enter the line
return new String[]{""}; into the parseLine method and the line
return new String[][]{{""}}; into the getData method.
The compile error on the loadData method is because we don't have the associated import
for the File object type that is the parameter to the method. To resolve this error
you can left click on the red blob on the light-bulb in the left hand margin you should get the
option to Add import for java.io.File, left click this option and the import is
added to the top of the class.
Your class should now look like the one in Figure 5.
Next create two methods in the CSVWriter using the lines:
public boolean saveData(String fullFileName, String[][] data){}public String constructLine(String[] data){}
Your class should now look like the one in Figure 6.
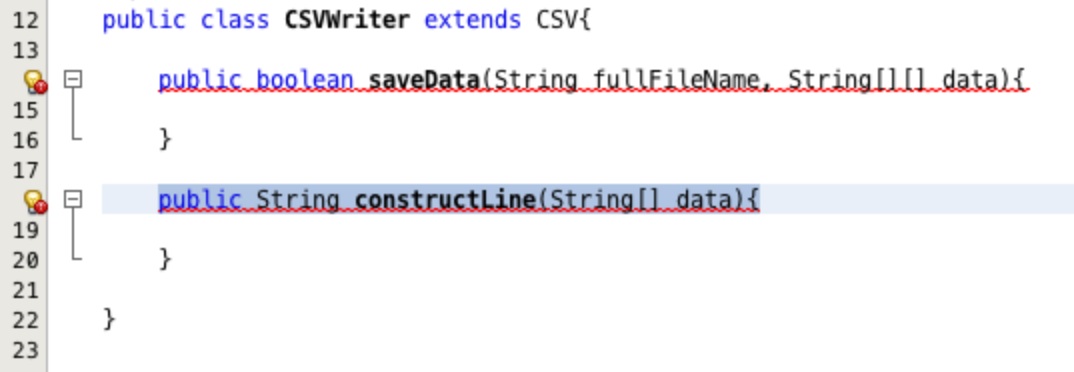
The two compile errors are because we have not inserted any return types. To temporarily
resolve this issue insert the line return false; into the saveData
method and the line return ""; into the constructLine method.
Your class should now look like the one in Figure 7.

Designing Test Conditions:
To design the test conditions that our classes need to adhere to we need to think about
what we want them to do and perhaps more importantly what we don't want them to do. Lets look
at the CSVReader first.
We want it to read the data into a two dimensional array of String[][]. The first dimension
is the rows and the second the columns. This is our first test condition.
We want the fields to be separated by commas, but sometimes we have a csv file that is delimited by a different character. So we would like to have fields parsed by a specified character. Condtion number 2.
When an empty field is encountered return an empty string in the corresponding location. This should be true whether the empty field starts or terminates the line.
If the number of fields for any record in the file is different report an error to the user.
OK now lets think about the CSVWriter.
We want it to save a file to the specified location and report an error if the file already exists.
The file should be complete and structured one row per line.
The correct delimiter should be used to construct the field boundaries.
This gives us four test conditions for each class, summary below.
CSVReader - Test Conditions Summary
- Return a 2D array. Dimension 1 = rows, dimension 2 = columns.
- Parse fields by specified character with no leading or trailing white space.
- Insert an empty string when an empty field is encountered whether at the beginning or end of line.
- Report an error if the number of fields is not consistent throughout the file.
CSVWriter - Test Conditions Summary
- Save file to correct location.
- Report an error if the file already exists.
- Check that all of the data is being saved, line by line.
- The construction of the fields should use the correct specified delimiter.
Now we need to write the tests to implement the test conditions. However, because of time constraints we will only implement the tests for the CSVReader in this practical. Have a go at designing some tests for the CSVWriter by yourself.
Implementing the Tests:
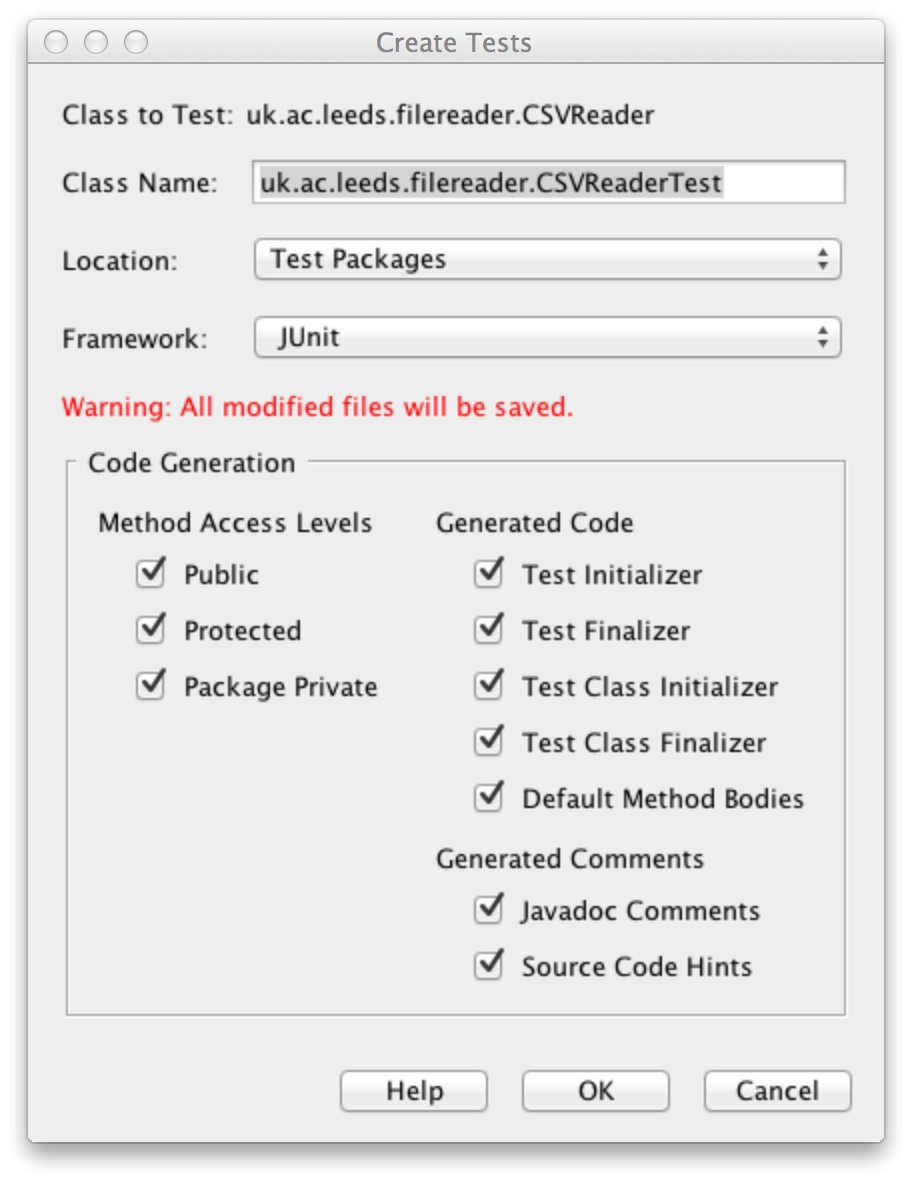
To create the tests we first need a test class. To create this right click on
the CSVReader file in the project browser and select Tools
and then Create Tests.
A screen similar to the one in Figure 8 will appear, leave all of the default settings and press OK. Explore the settings using the help menu at your leisure, the inbuilt help in Netbeans is very good, and there is plenty of online support.
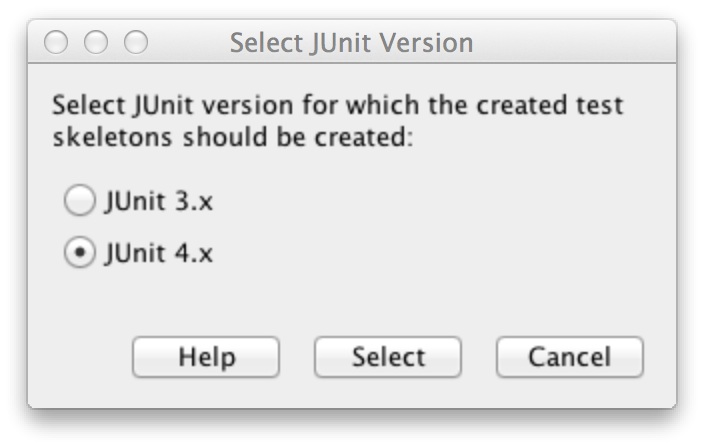
The next screen will ask you which version of Junit to use. Select version 4.x as shown in Figure 9.
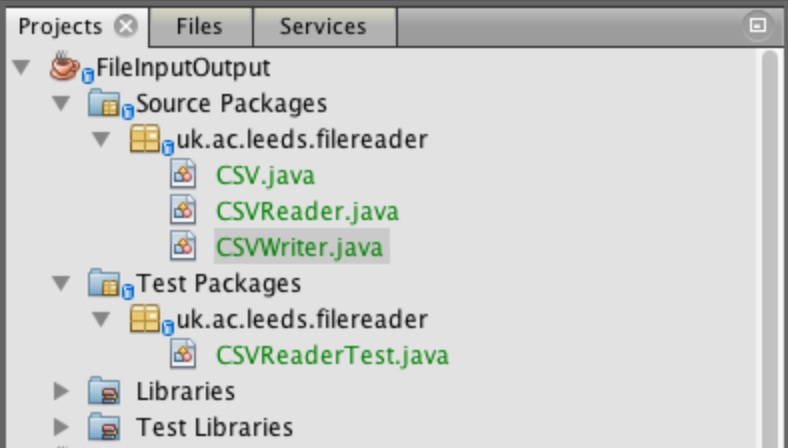
Expanding the Test Packages folder in the project explorer should reveal a
package with the same name as your package in the Source Packages folder,
uk.ac.leeds.filereader. Expanding the package will show a class has been
automatically generated for you called CSVReaderTest. See Figure 10.
Open up the test class CSVReaderTest. Scroll through the class, you will see a great
deal of automatically generated code. The three things we want to concentrate on are the three methods
with the notation @Test above them. These are the three tests that have been automatically
generated.
What we need to do now is adjust these auto-generated tests to implement the four test conditions we outlined above.
Test 1 - 2D array, dimension 1 = rows, dimension 2 = columns.
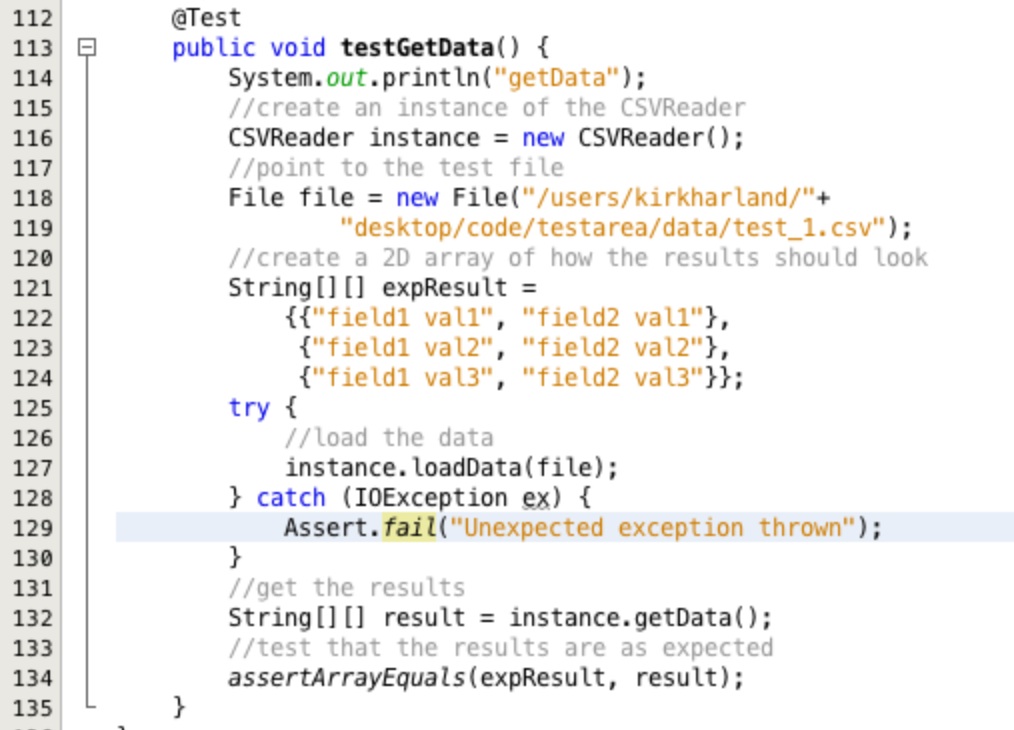
testGetData method. It will look like the one in Figure 11.
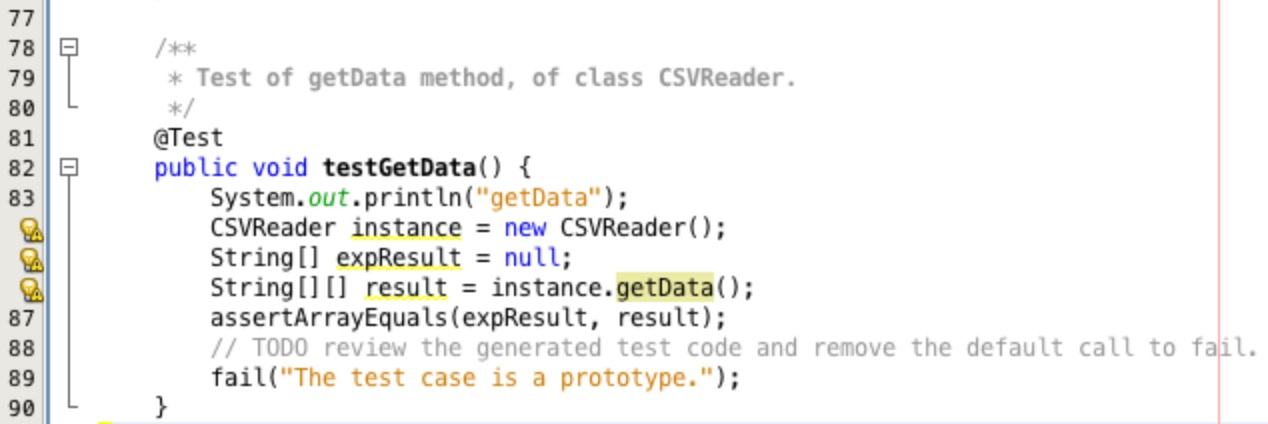
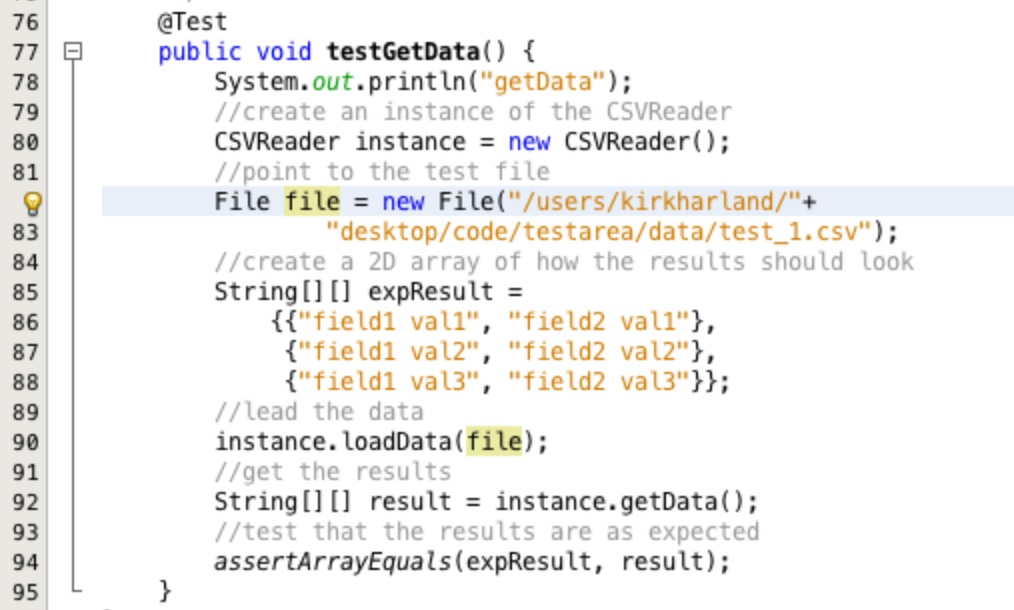
Adjust the code in the testGetData method to reflect that in Figure 12.
Download the test_1.csv test file and save it locally on your computer by right clicking the link and selecting Save Linked File As.... Adjust the line starting at 82 to point to the location of the file on your computer. Windows users will need to add the drive identifier at the start of the path, for example 'C:/test_folder/testing directory/test_1.csv'.
The test procedure creates an instance of the CSVReader called instance
and creates a file from the test_1.csv. A two dimensional array of expected values is created called
expResult.
The instance object is used to load the data and then the loaded
two dimensional array is retrieved using the getData method. The returned array is then
compared against the expected results which only returns true if the two arrays contain the same values.
Test 2 - Parse fields by specified character with no leading or trailing white space.
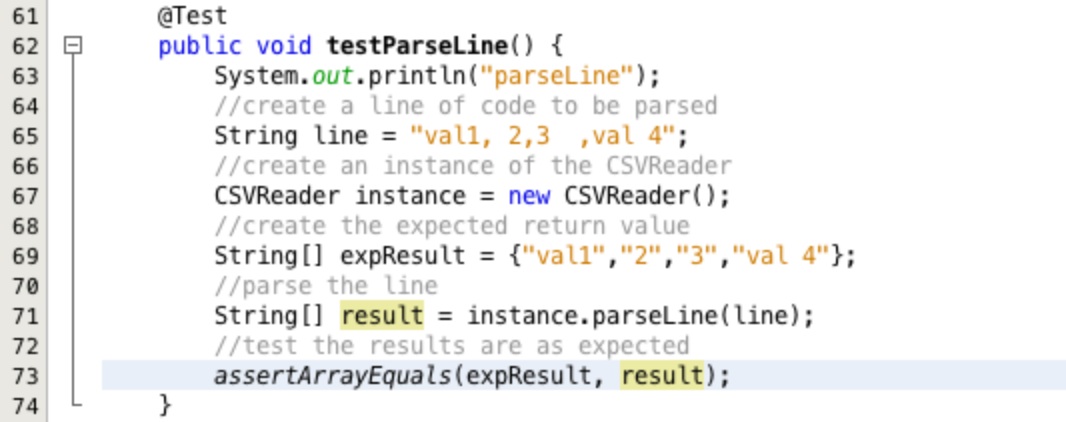
Adjust the code in the method testParseLine to be consistent with that shown in
Figure 13.
This method creates a line to be parsed, it the instantiates CSVReader into an object
called instance. The results as they are expected to be returned are created and the
parsed results are obtained from the parseLine method. The expected and actual results
are compared to see if they are the same.
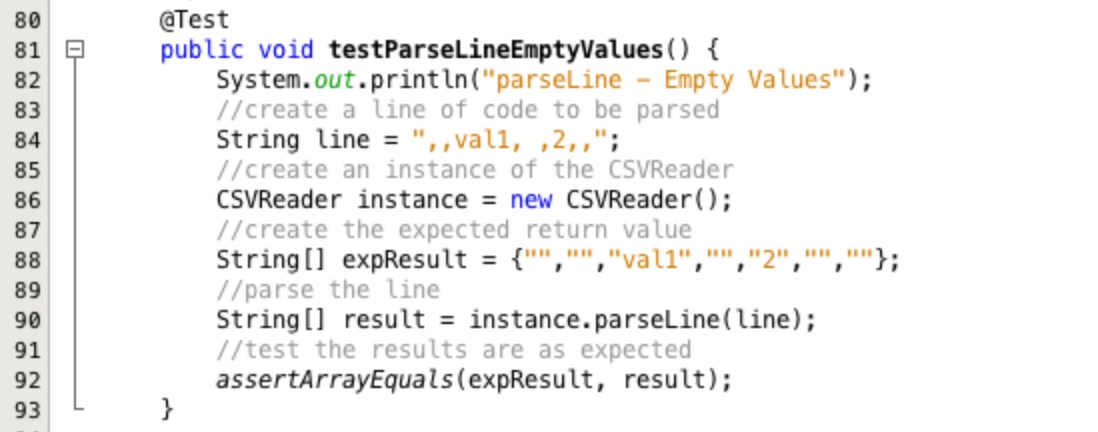
Test 3 - Insert an empty string when an empty field is encountered whether at the beginning or end of line.
Create a new test method called testEmptyFields and insert the code as shown in
Figure 14.
This method is almost identical to that in the testParseLine test method. The only
difference is the input to the parseLine method and the expected result. The input and
result is designed to ensure that empty fields are not ignored when at the beginning or end of a line.
This test could have been combined with the one above. However, as your test library grows for a procedure it is beneficial to break tests for specific behaviours into separate test methods so it is easy to see what behaviour is failing a test.
Test 4 - Report an error if the number of fields is not consistent throughout the file.
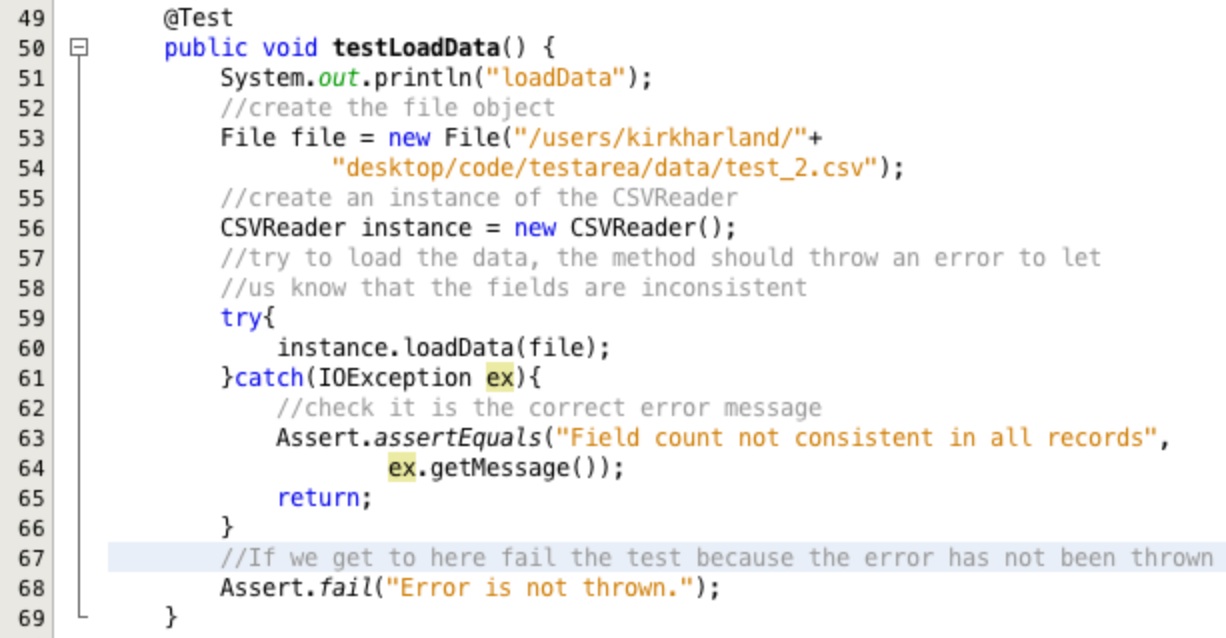
Adjust the code in the method testLoadData to be consistent with that shown in
Figure 15.
Download the test_2.csv test file and save it locally on your computer by right clicking the link and selecting Save Linked File As.... Adjust the line starting at 53 to point to the location of the file on your computer. Windows users will need to add the drive identifier at the start of the path, for example 'C:/test_folder/testing directory/test_1.csv'.
This test is more complex than the previous three. In order to report something has gone wrong with
the field structures we need to raise an error in our loadData method when the problem
is identified. Which means we need to test for the error here.
We use the try catch block to detect if the error is thrown, if it is we can then,
check that the specific message matches the one to be used. If the error is not thrown of the
message does not match then the code will fall continue on to the assert.fail statement
and the test will fail.
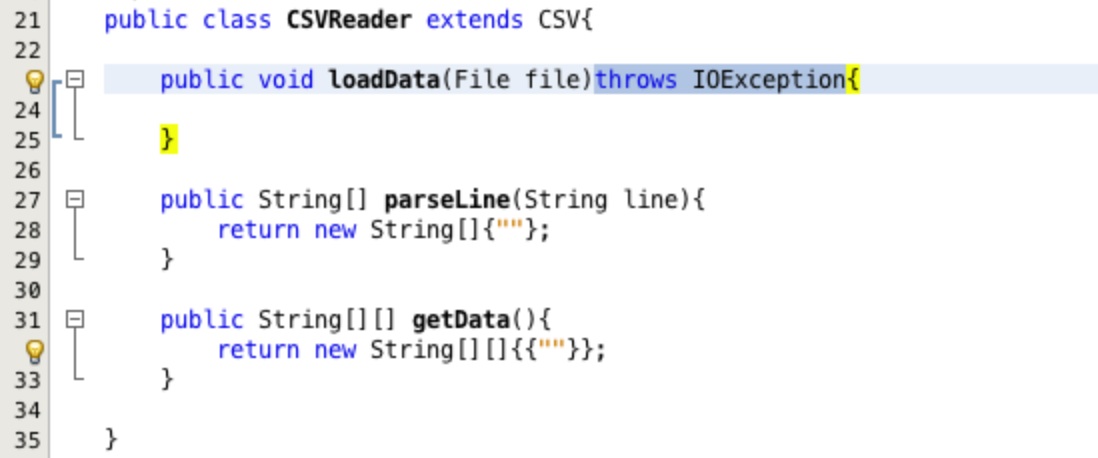
Inserting an error to be thrown is a change to the method declaration so we need to add this to our
loadData method to make sure all of our tests compile. Insert the code
throws IOException immediately after the method declaration but before the opening brace as shown
in Figure 16.
This raise an error mark on a suggestion light bulb in the left hand margin. Left click on the suggestion will provide the option to Add import for java.io.IOException, select this option and the IDE will add in the line of code for the import.
Once the loadData method has been adjusted the CSVReaderTest test class
will show an error. Navigate to the line causing the problem and you will see a suggestion light bulb
in the left hand margin. Click on this and you will be provided with a list of three options:
- Add throws clause for java.io.IOException
- Surround statement with try-catch
- Surround block with try-catch
Adding the throws clause to the method declaration means that everywhere that this method is called needs to handle the potential exception. In this case we can select the second option Surround statement with try-catch and the IDE will fill in the try-catch code for us resolving the issue. Replace the automated logging line in the catch clause with a call to fail the test as shown in Figure 17.
That is all of the CSVReader test implemented. To run the tests, right click on the
CSVReader class in the project area and select Test File.
The output below the text editor will look something like Figure 18. This shows that all of the tests have failed. Now we need to write the code in the two methods to satisfy the test conditions.

CSVReader. The next section will develop the code to satisfy the tests stage by
stage.