Optimisation Practical
[Practical 10 of 11] - part 2
Create the MenuBar:
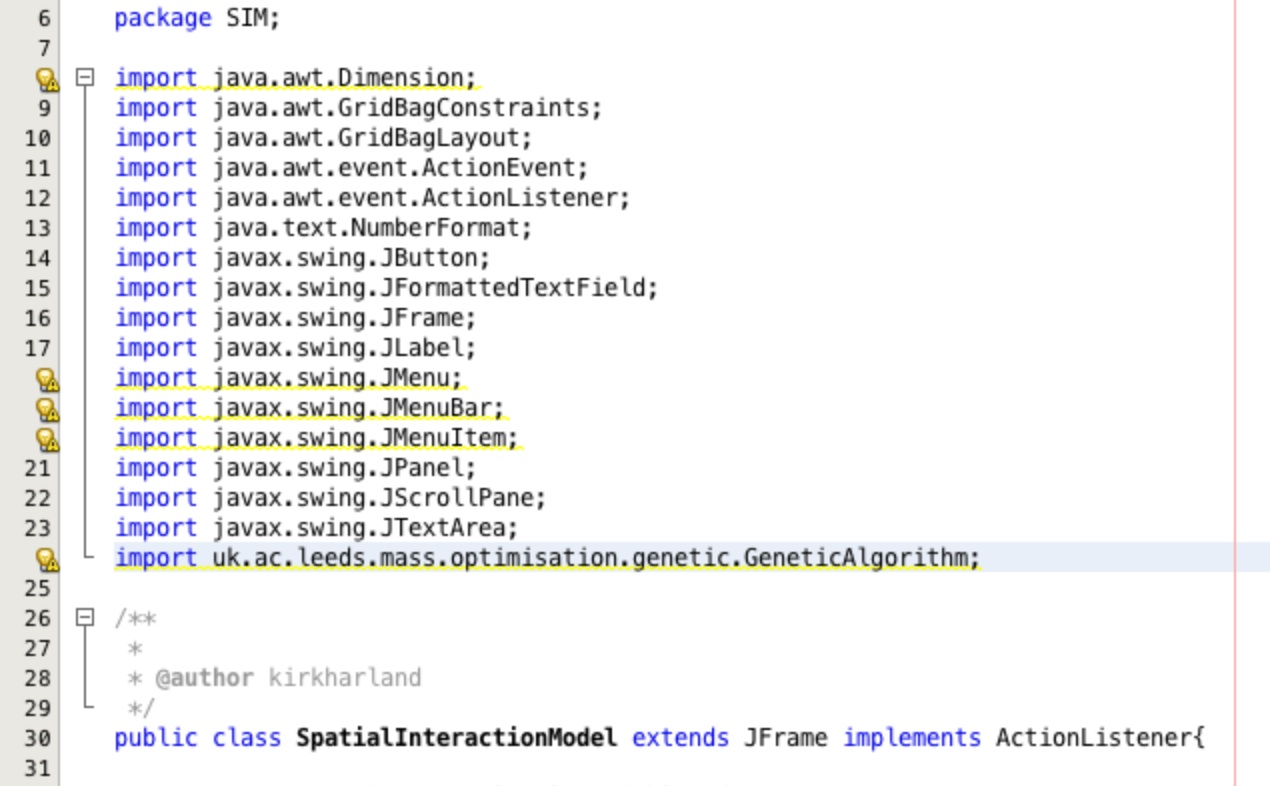
Check that your imports list matches that shown in Figure 9. Add any that are missing.
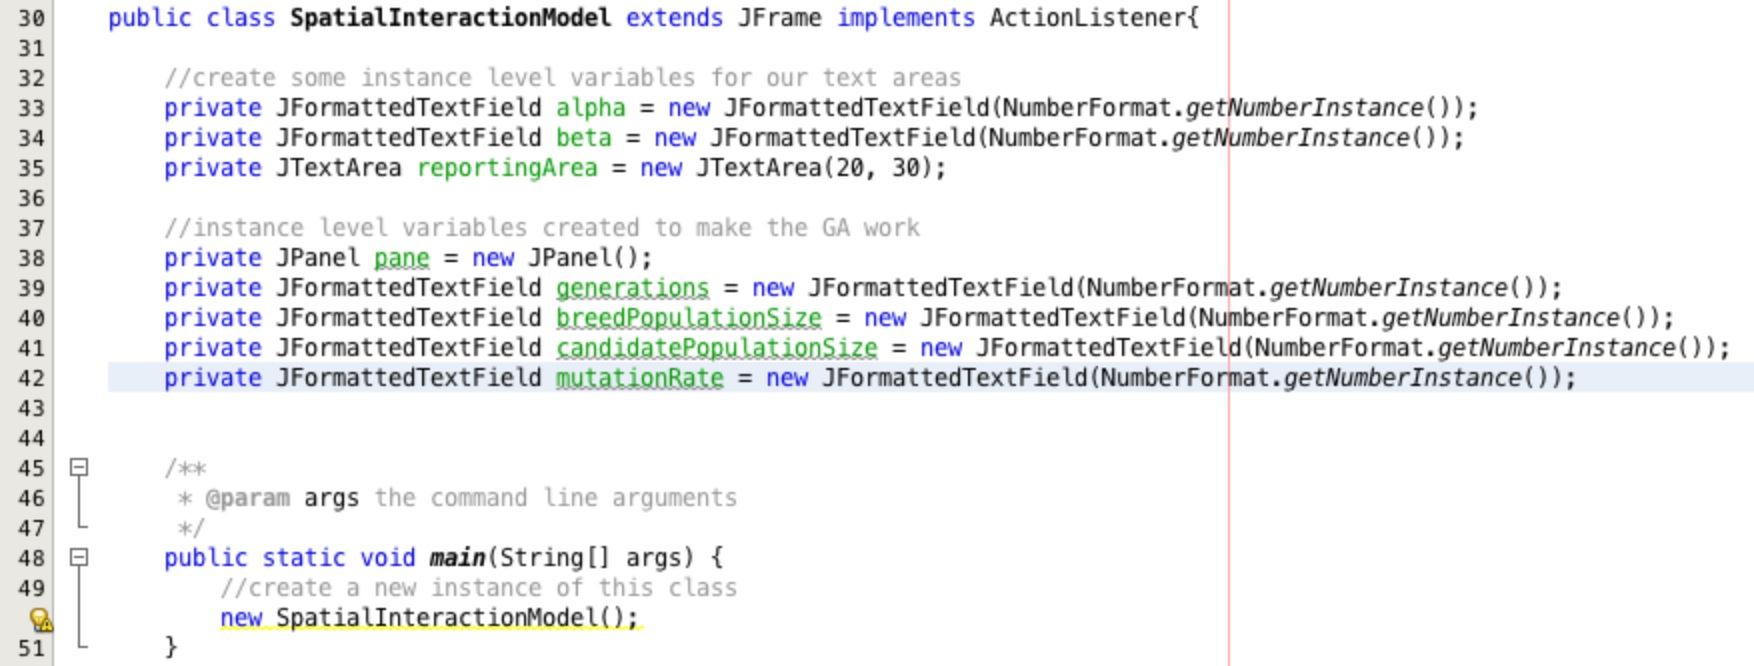
Add the five instance variables as shown in Figure 10.
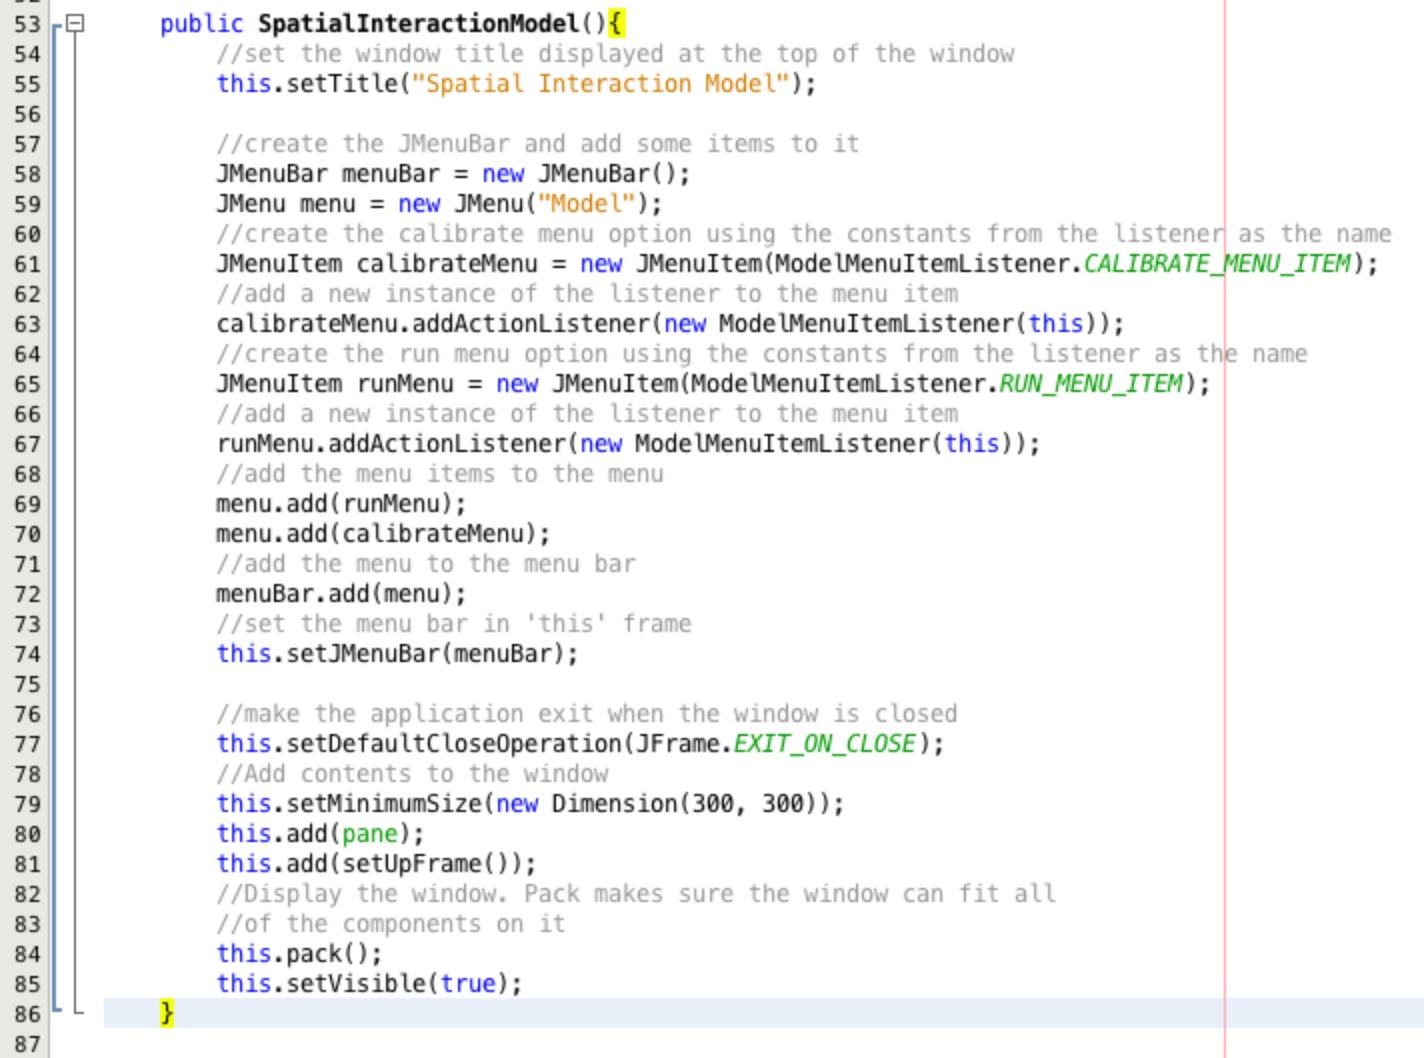
Adjust the code in the main method to match that shown in Figure 11. This will add the menu bar and also ensure we have a minimum size. Make sure you make all of the changes some are quite subtle...
Adjusting the GUI Controls:
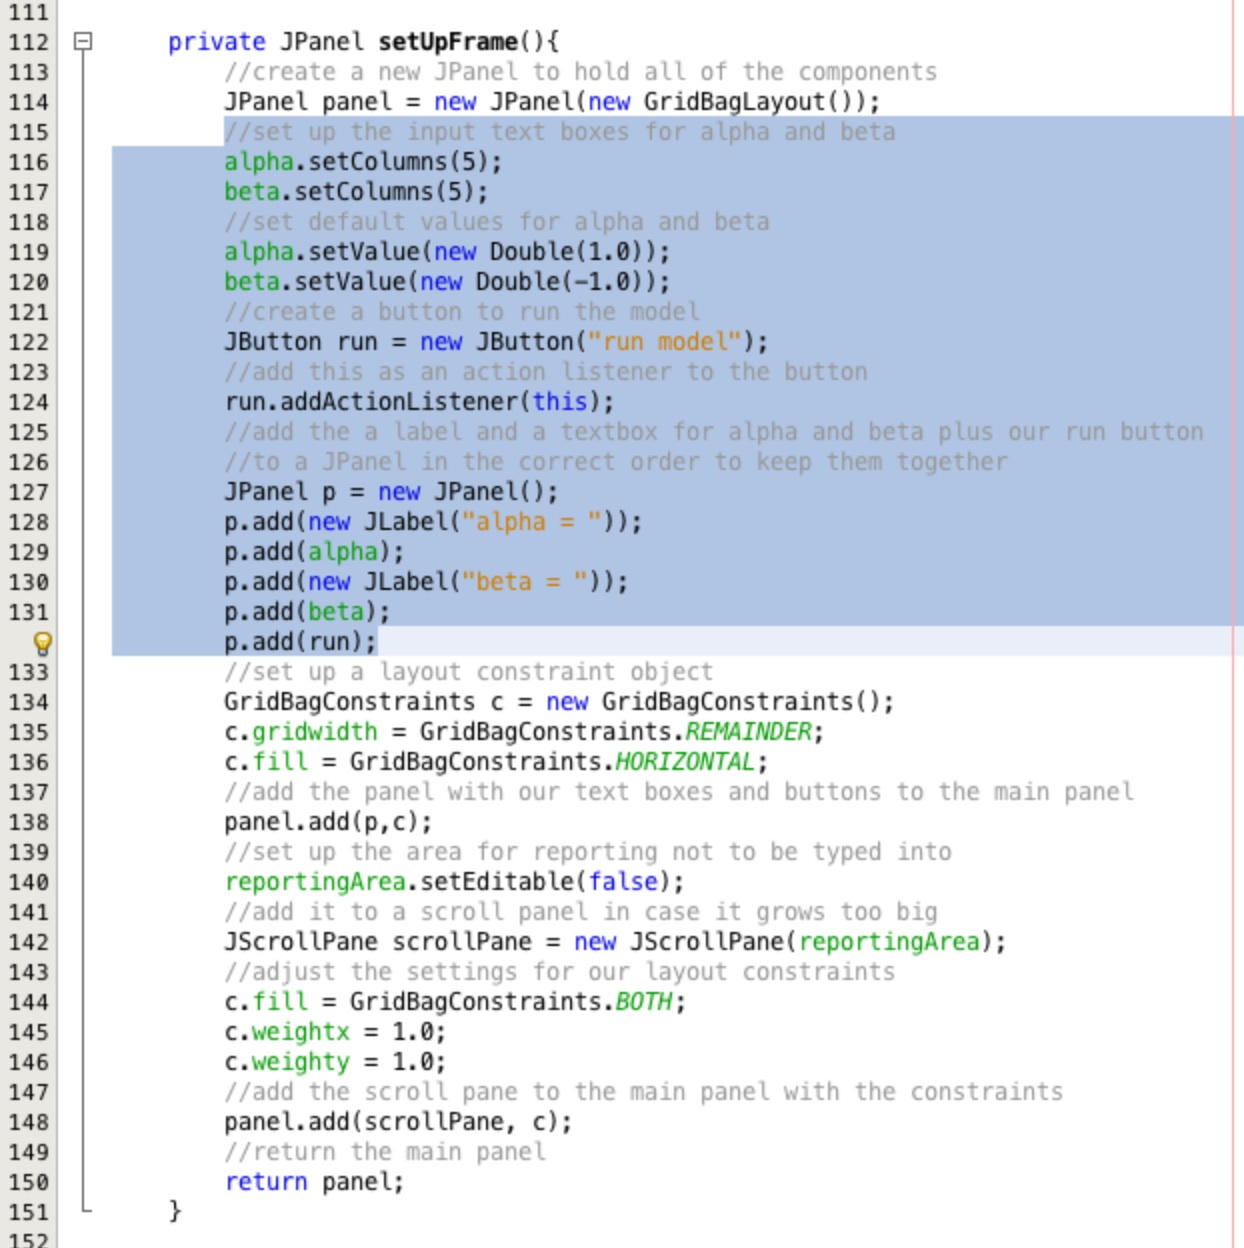
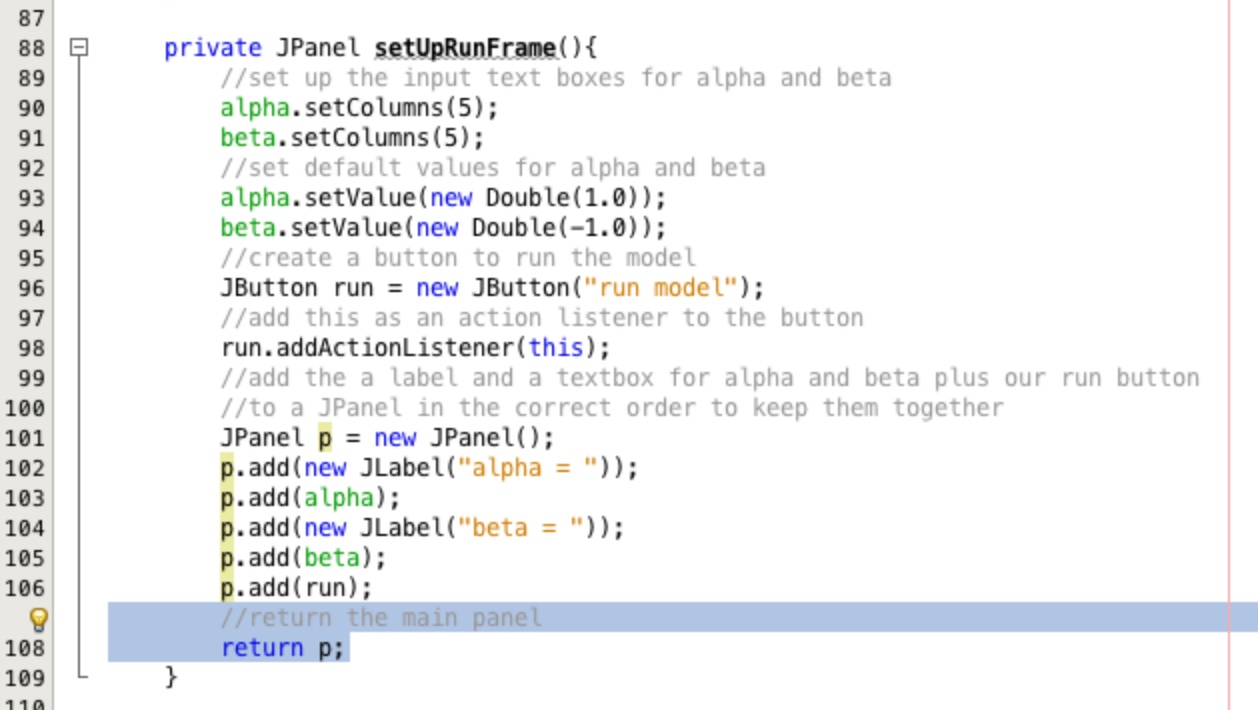
Create a new method, private JPanel setUpRunFrame. Cut the code from setUpFrame highlighted
in Figure 12 and paste it into the new method.
Add a line at the bottom to return p;. This separates out the controls specific to the run of the model
from the rest of the control building process. The new method should look like the one in Figure 13.
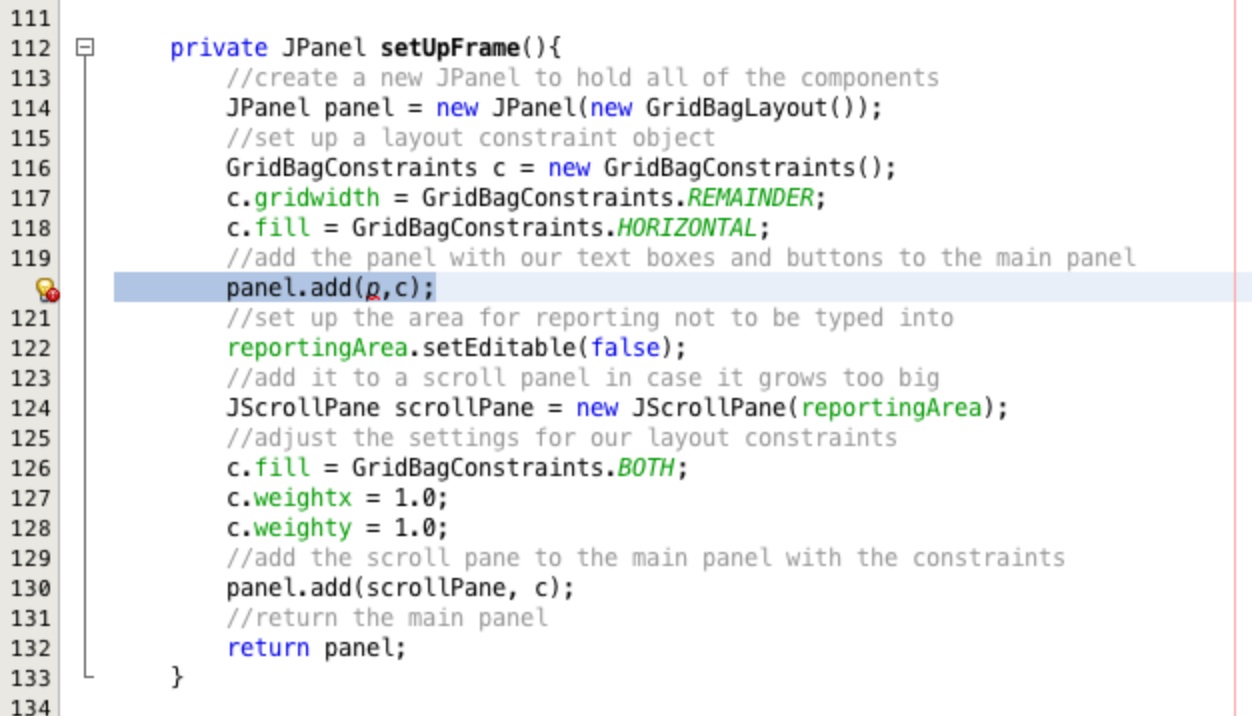
Adjust the highlighted line in Figure 14 to add the instance level pane rather than p. The line should
read panel.add(pane,c);. This will remove the error and adds the instance level JPanel to the main layout.
This will be adjusted to contain the single run specific input controls or the calibration specific controls when the user
makes a selection.
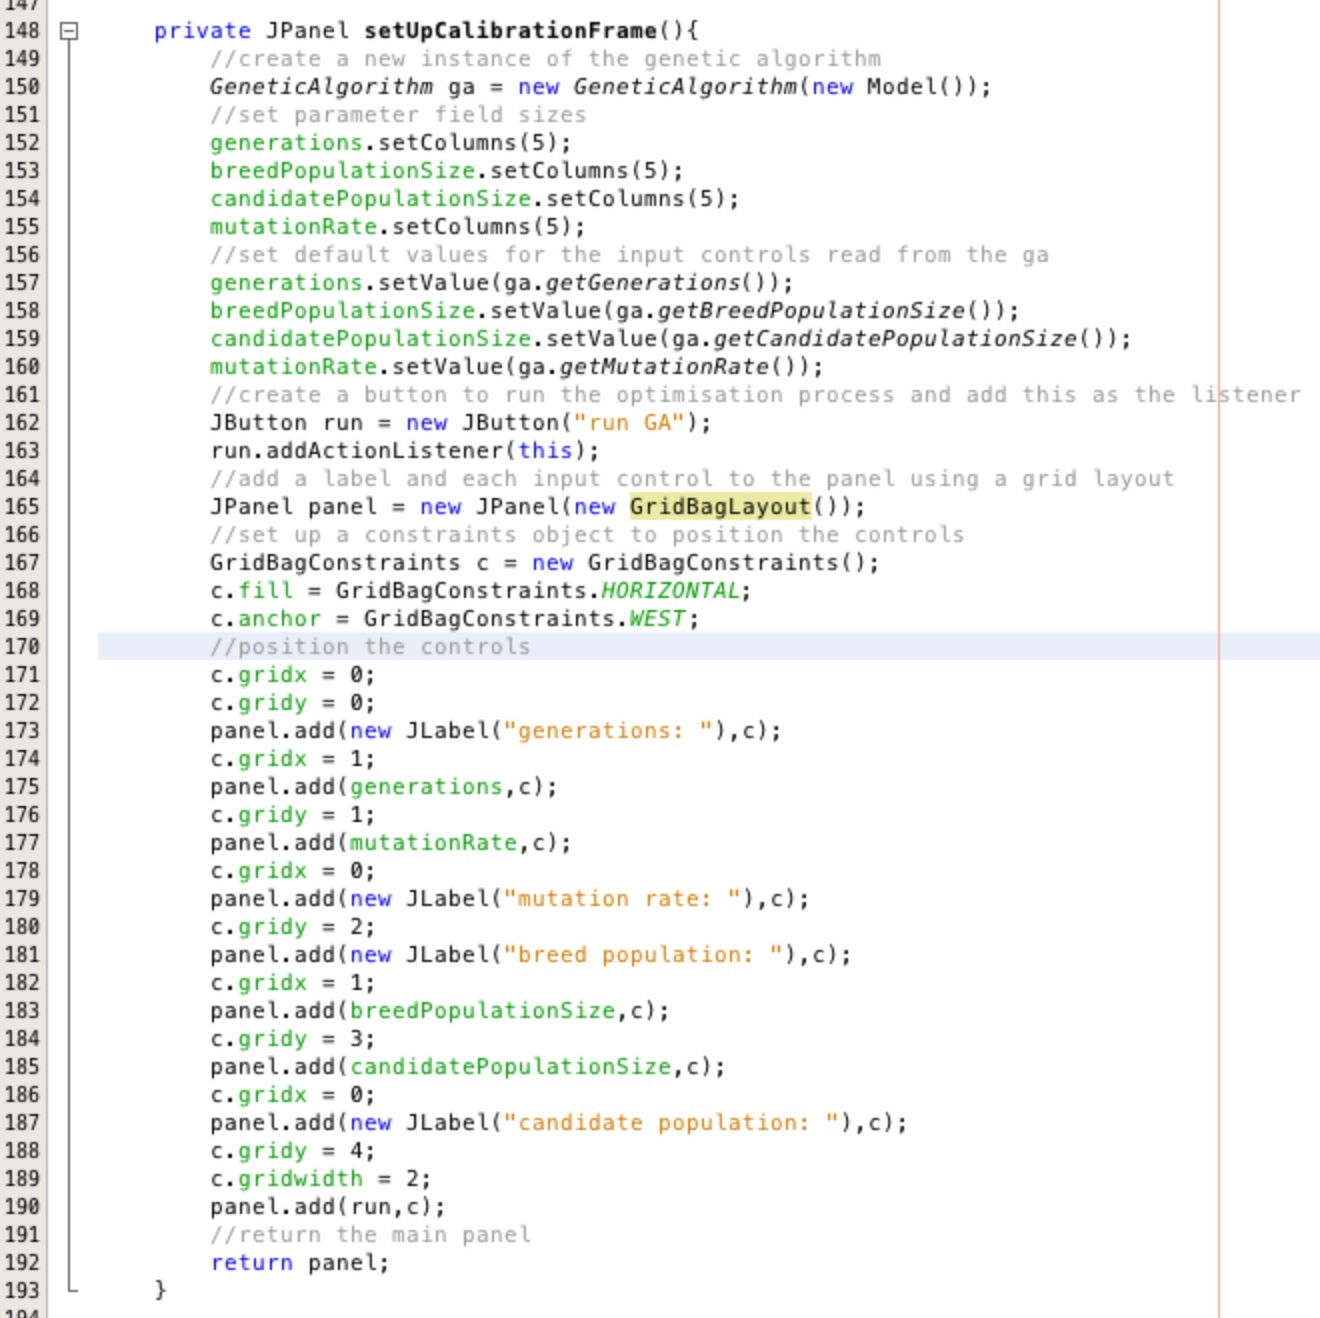
Add a method private JPanel setUpCalibrationFrame to add the controls specific to running the genetic algorithm
to a JPanel.
This panel uses a GridBagLayout and a GridBagConstraints object to position the controls. Each
control is placed on the JPanel at a grid coordinate. You do not set the number of rows or columns, this is worked out
by the layout when the controls are added. Simply add one to your value assigned to .gridx when you want to
move to the right by a column and add one to the value assigned to .gridy when you want to move down.
You can also stretch controls across multiple rows or cells by setting .gridwidth and .gridheight.
Because we are directly assigning to these grid GridBagConstraints attributed we know that they are not methods but rather
fields in the object because we do not use () anywhere.
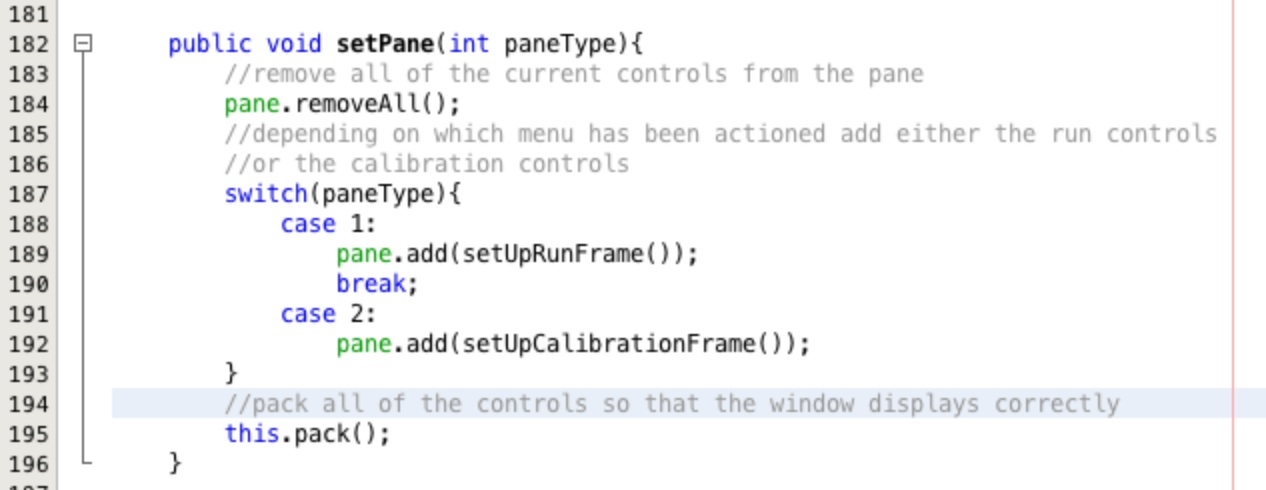
Add a method public void setPane(int paneType) as shown in Figure 16. This is the method called from the
ModelMenuItemListener and indicates which menu has been selected.
Add the highlighted line to method report as shown in Figure 17. This will make the text area update even
when the optimisation code is working intensively.

Connect the Genetic Algorithm:
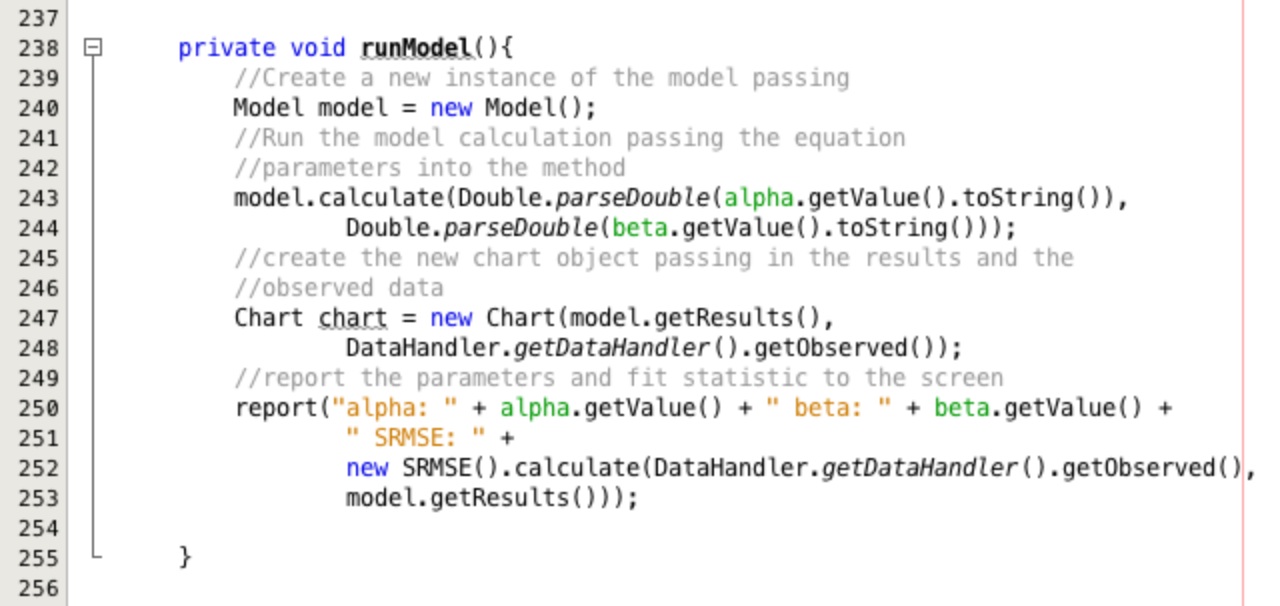
Add the method runModel as shown in Figure 18. This is the series of commands required to run the model
once only.
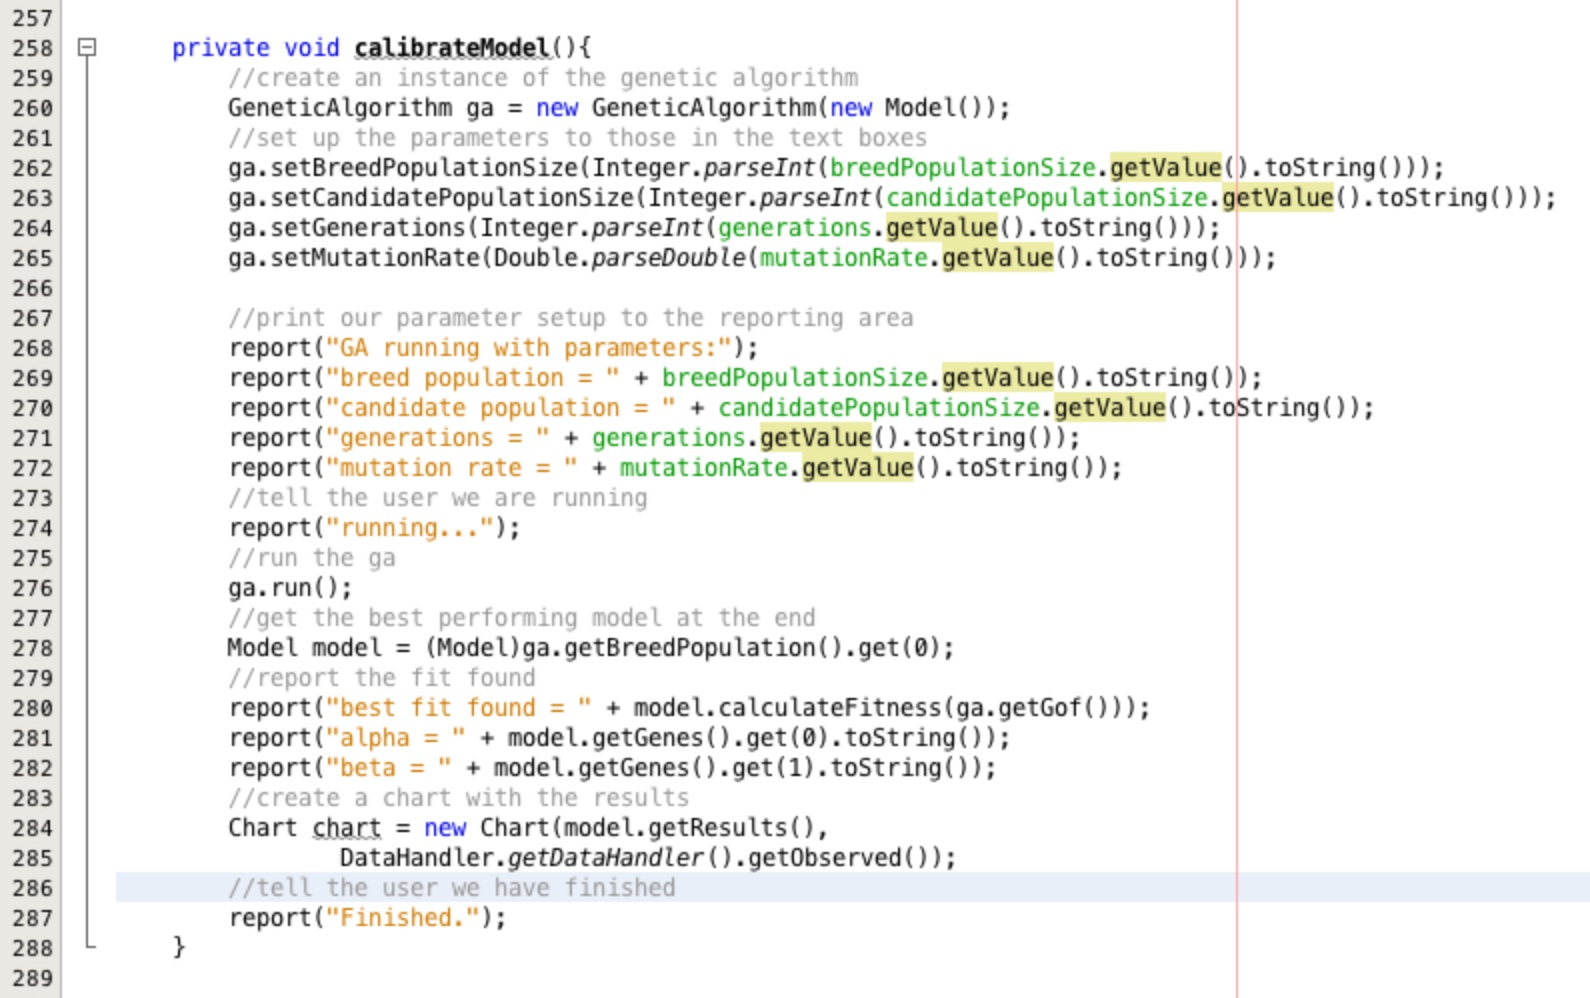
Add the method calibrateModel as shown in Figure 19. This is the series of commands required to
optimise the parameters in the model. The code will run the genetic algorithm to find the optimal parameters and then
output the results and produce a chart with the best performing results.
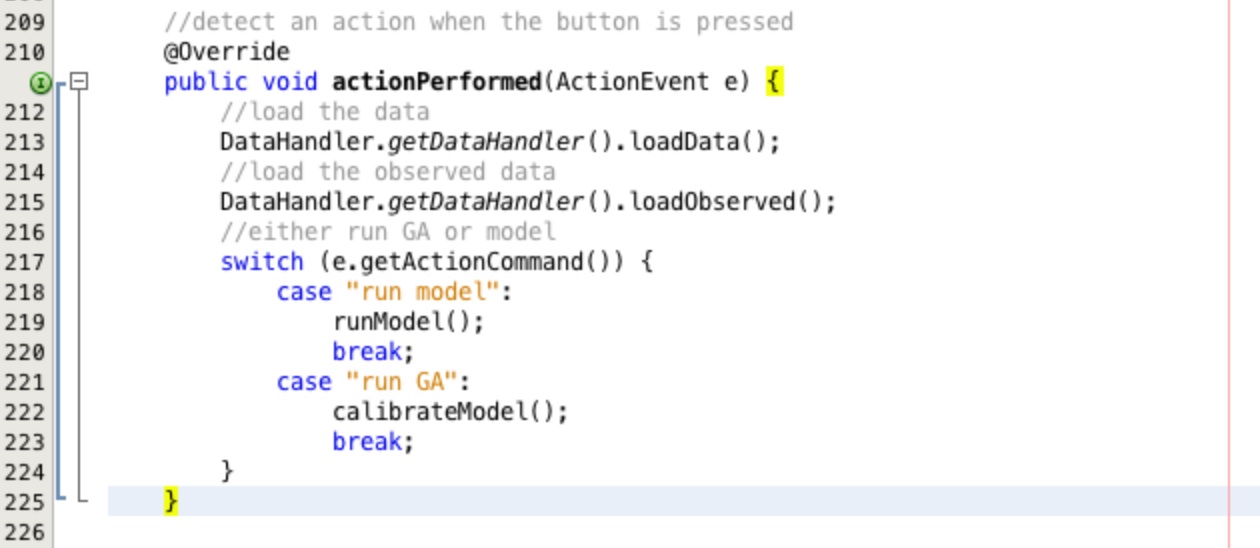
Finally, update the method actionPerformed as shown in Figure 20. Have a look at how the event listener and
process works for both the buttons and menu items, these are good examples of object orientated design patterns.
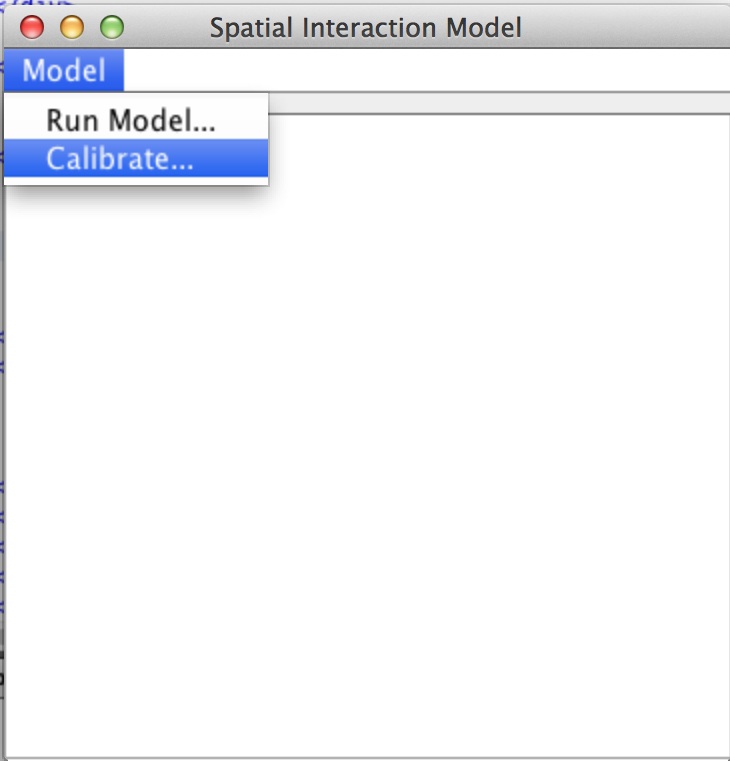
Thats the end of the practicals. You should now see the GUI as in the images below. Try running it to find the solution for our small model, does it do better than you managed? Vary the parameters for the genetic algorithm, what impact do they have on the outcome? Look back over the code and try and think how the examples relate the code construction theory you covered in the lectures. For example try and answer this question, just how does the genetic algorithm run the spatial interaction model?
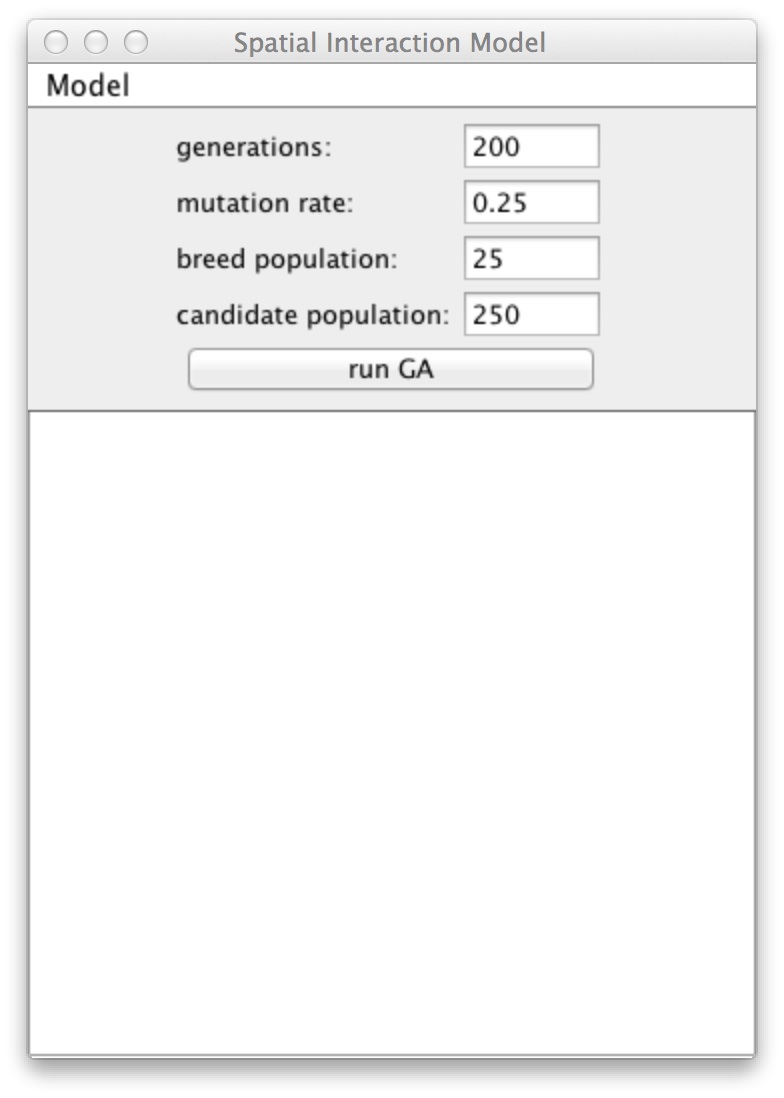
If you want to develop this code further for your research try and use the data reader we built to read in your own data.
Explore the use of JFileChooser to help you select your files. Good luck with you modelling future
and I hope you have enjoyed these practicals and you find them useful...
Don't forget to check the repository MassAtLeeds from time to time to see if there are useful code snippets you can use.