Spatial Interaction Modelling: Structuring into methods
[Practical 5 of 11 - Part 2]
Factoring Out Model Errors:
We have now refactored the original spatial interaction model code into more sensible blocks. Ones to load the data and ones to run the model in separate classes. Within those classes we have factored the code into separate blocks to load different parts of the data or calculate different sections of the model equation.
This is all good progress but it has introduced a series of errors. These can be seen by the white on red highlighted exclamation marks on the class, package and project symbols and on the class tab in the text editor area. The exact lines where the compile-time errors have been identified are shown in the right hand scroll bar of the text editor area by the red bars, the little black line is the location of your cursor. This can be seen in Figure 16.
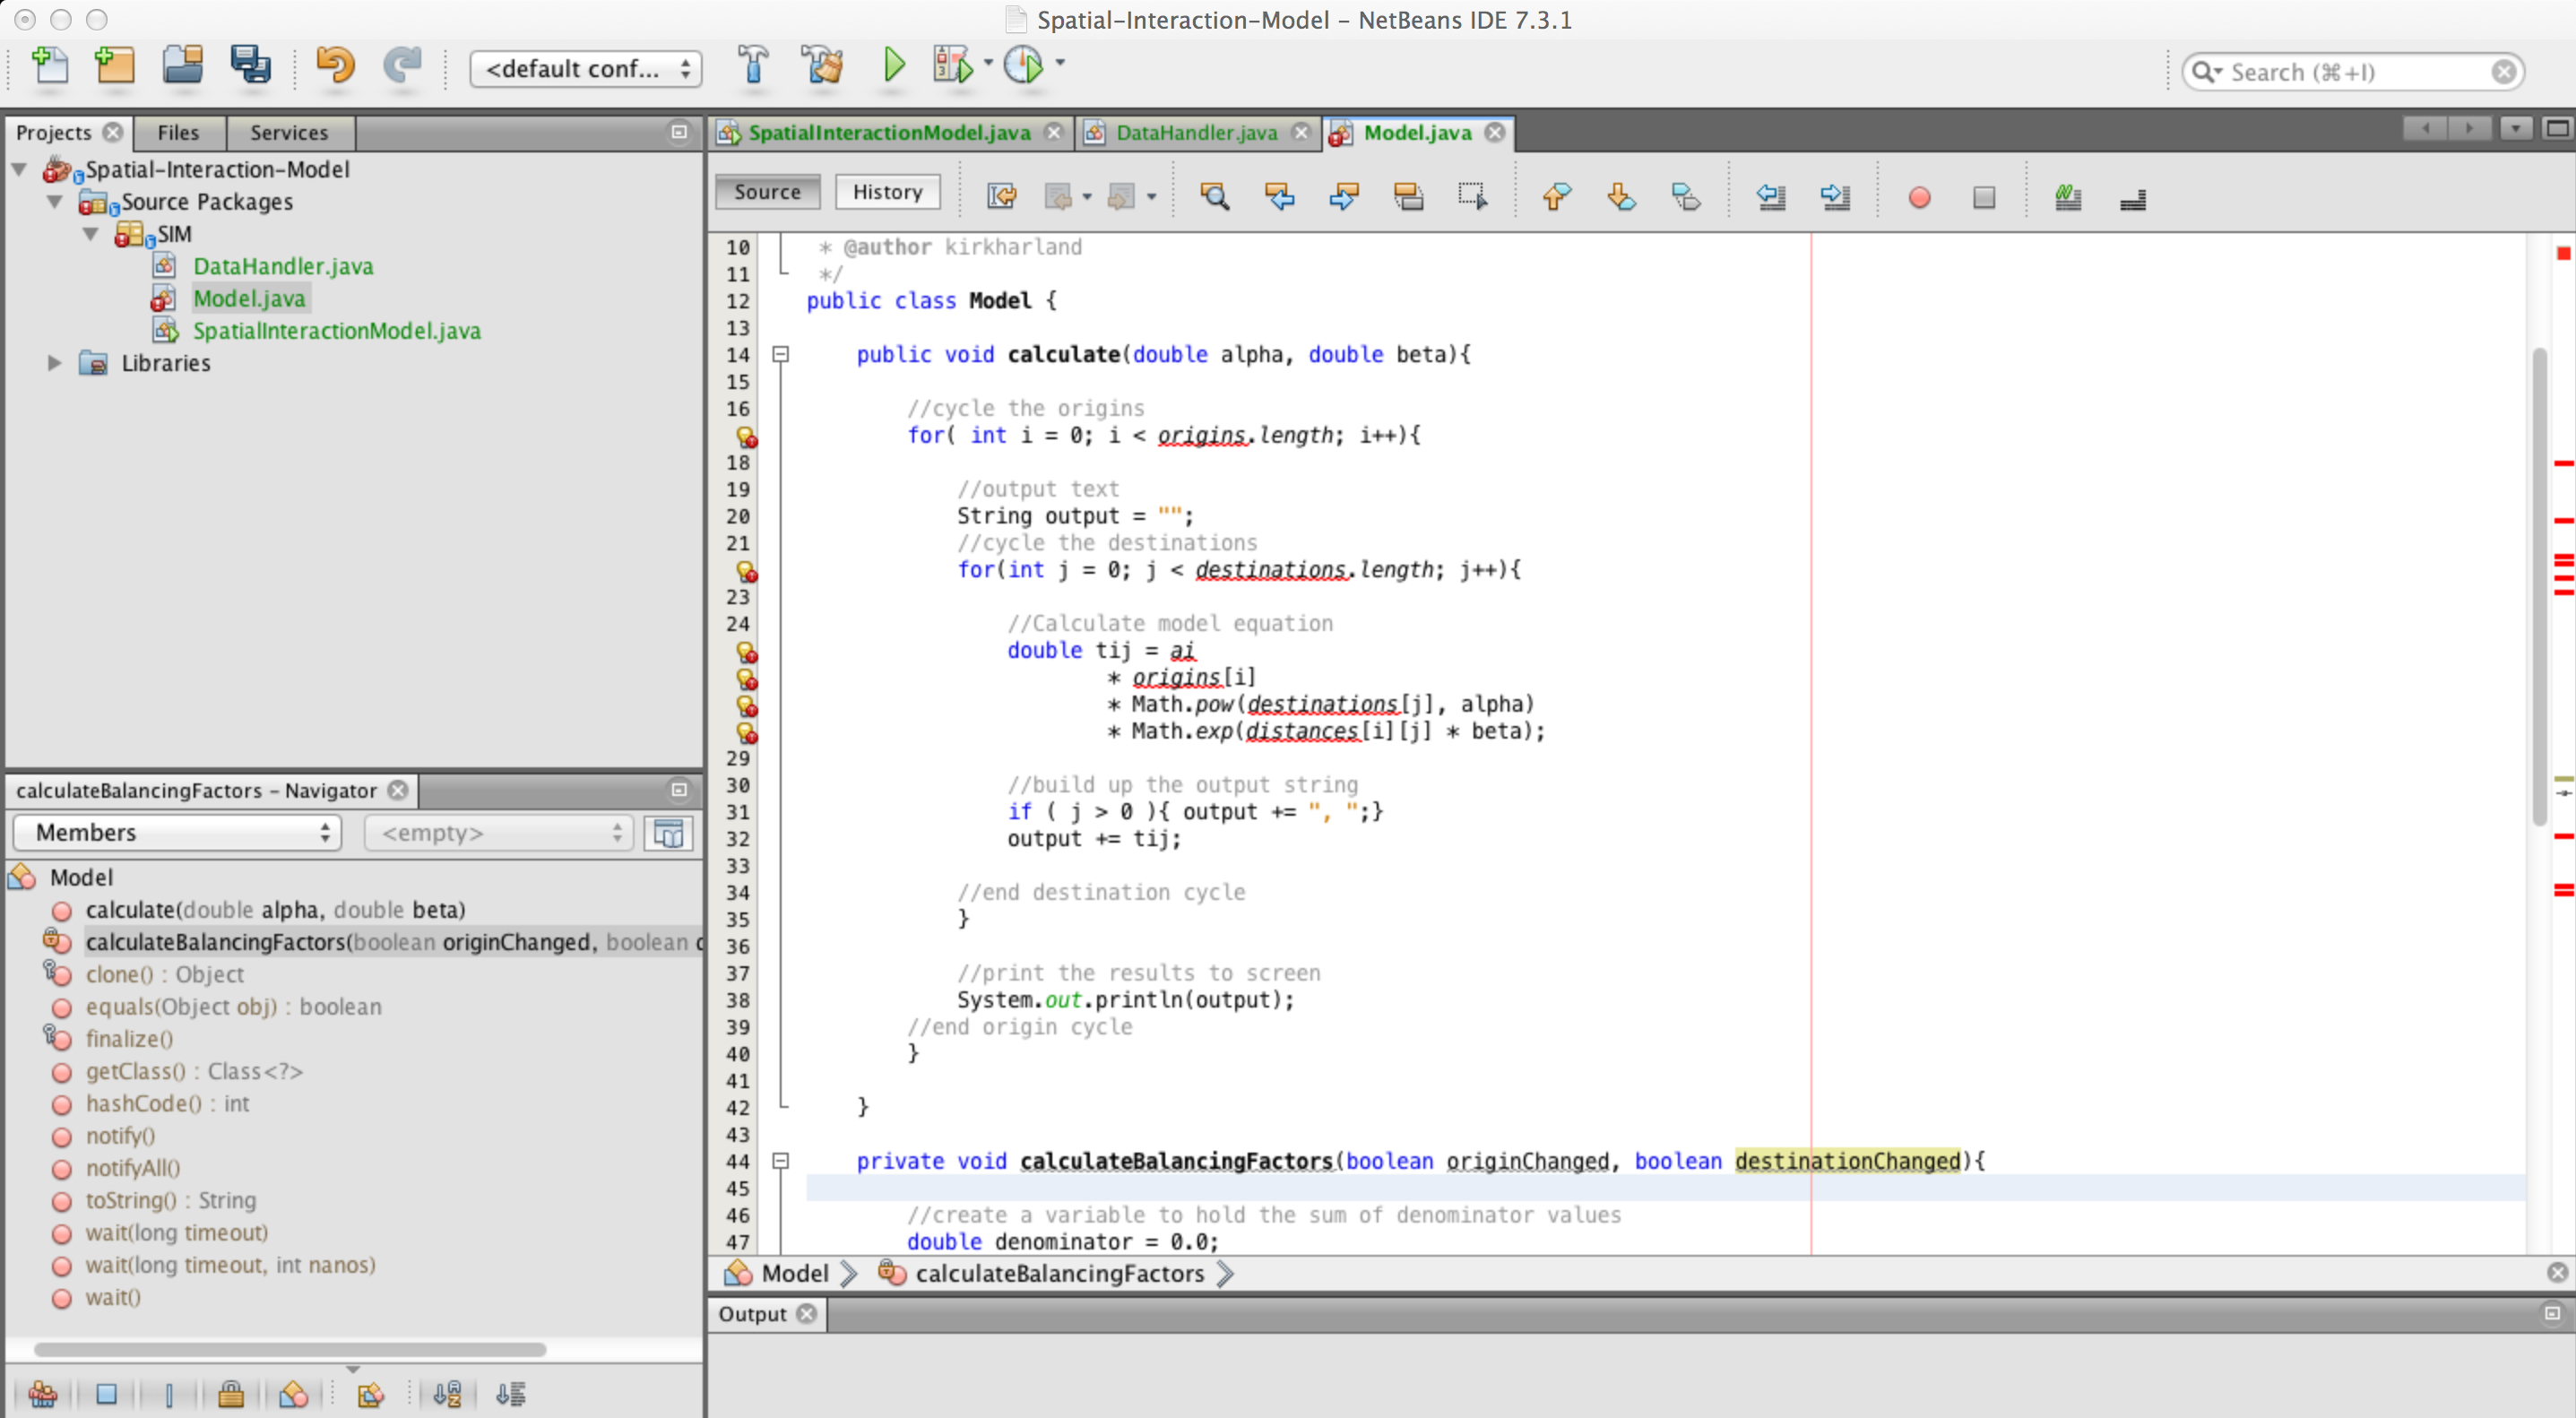
Lets correct the first error in the class, this is on line 17 in Figure 16. This error occurs because we
are trying to access the length attribute of the origins array. However, we no
longer have an origins array. The first thing is to gain access to the data where the array
holding the origin data can be accessed.
When we calibrate models we have the requirement to run them across a dataset many times but we only want to load the data once as this can be a processor intensive operation taking some time to complete. So we don't want to put the call to load the data within the model. The best way to handle the data is as a parameter which is preloaded and passed into our model when it is constructed.
To do this lets create a constructor for our model which takes a parameter of type DataHandler.
Make the constructor public access. To be explicit that we don't want anyone to make a
Model object without giving it some data to work from we will also declare an empty
constructor that takes in no parameters and give that private access.
So now we can create a Model object and provide a DataHandler loaded with data.
But none of the other methods can access it, we need to expose it at the class level. Declare an instance
variable of type DataHandler and call it data with private access.
Inside our constructor simply set the instance level variable data to equal the parameter
data.
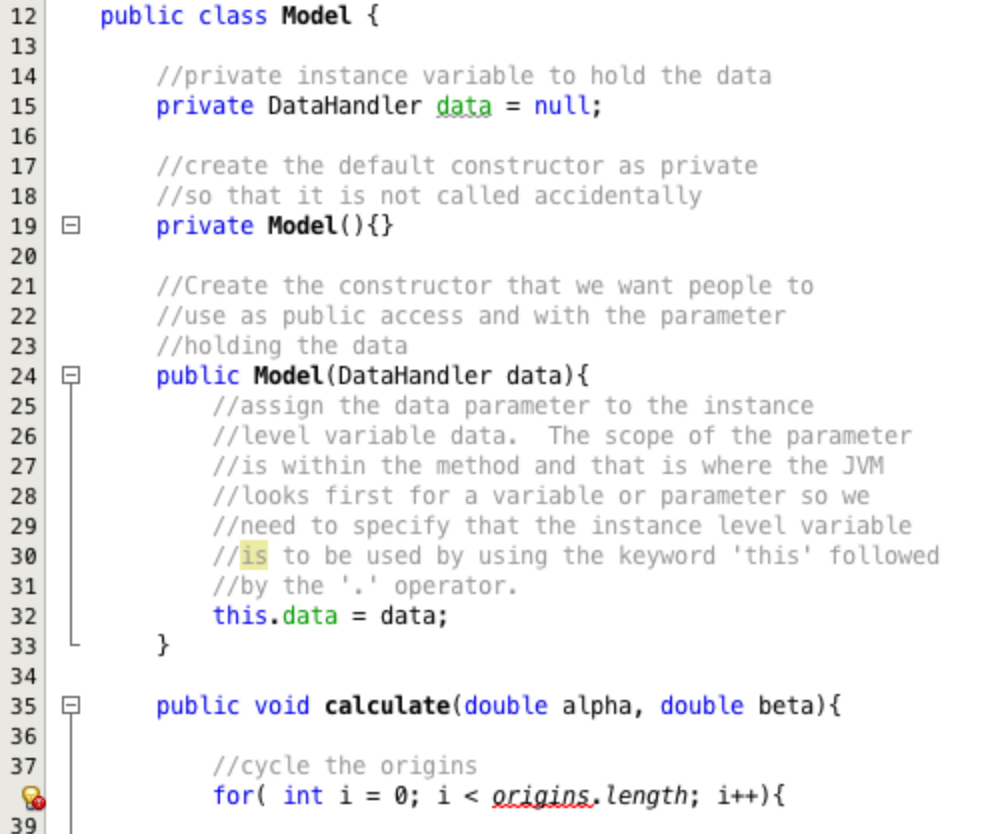
Now we have some data we can use this to get to the length of the origins array. Replace the code
origins.length in the for loop with a call to the origins array in the data
object. We then use the .length to access the length property of the array that is returned.
We can do all of this on one line as in Figure 18, or we could return the origin array into a declared
array and use that local variable to access the attribute. The two approaches are the equivalent. To
use the second approach we would use the code double[] origins = data.getOrigin(); and then
use the local variable origins to access the array length attribute in the for loop with
for( int i = 0; i < origins.length; i++){.
Note, after you have typed the name of the data object and used the .
operator you are provided with a list of accessible options. This is called intelisense and is another
way that the IDE tries to make our lives easier... We don't have to remember everything!
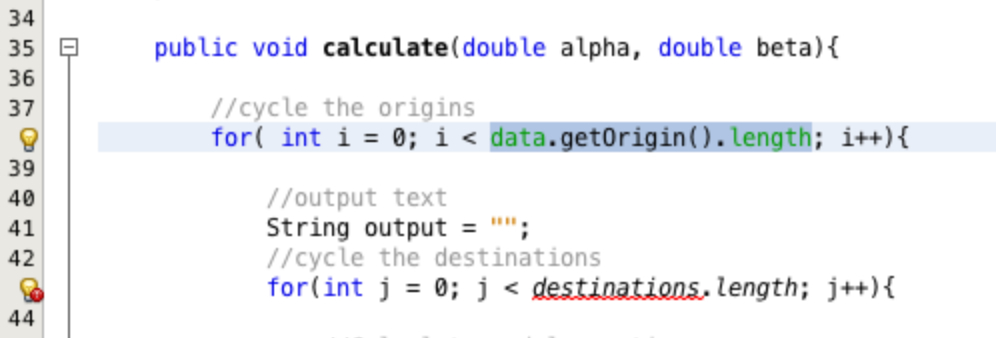
We can use the same approach for the destination loop as shown in Figure 19. The only difference here is
that instead of calling the getOrigin() method we call the getDestination().
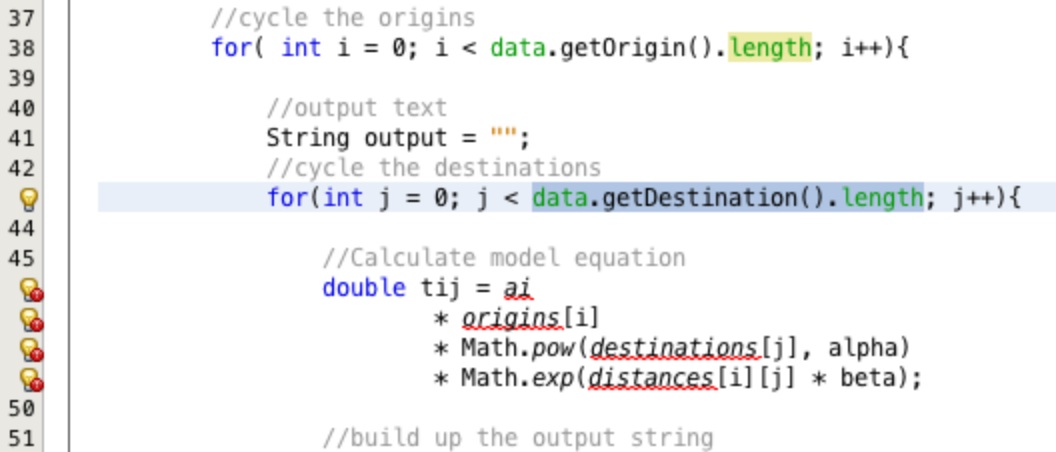
We can also alter the code to access the values. For the origin and destination values we must remember
that we are getting an array back so using the accessor method will not provide one double
value but an array object. To get to the individual value we need to still use the index of the element.
There are two ways to approach this. The first is to get a local reference to the array by creating a variable pointing to it. Remember that getting a local reference just puts another label on the object it does not create another object.
So we could do double[] origins = data.getOrigin(); and
then use the local variable like this double tij = ai * origins[i] * Math.pow(destinations[j],
alpha) * Math.exp(distances[i][j] * beta);
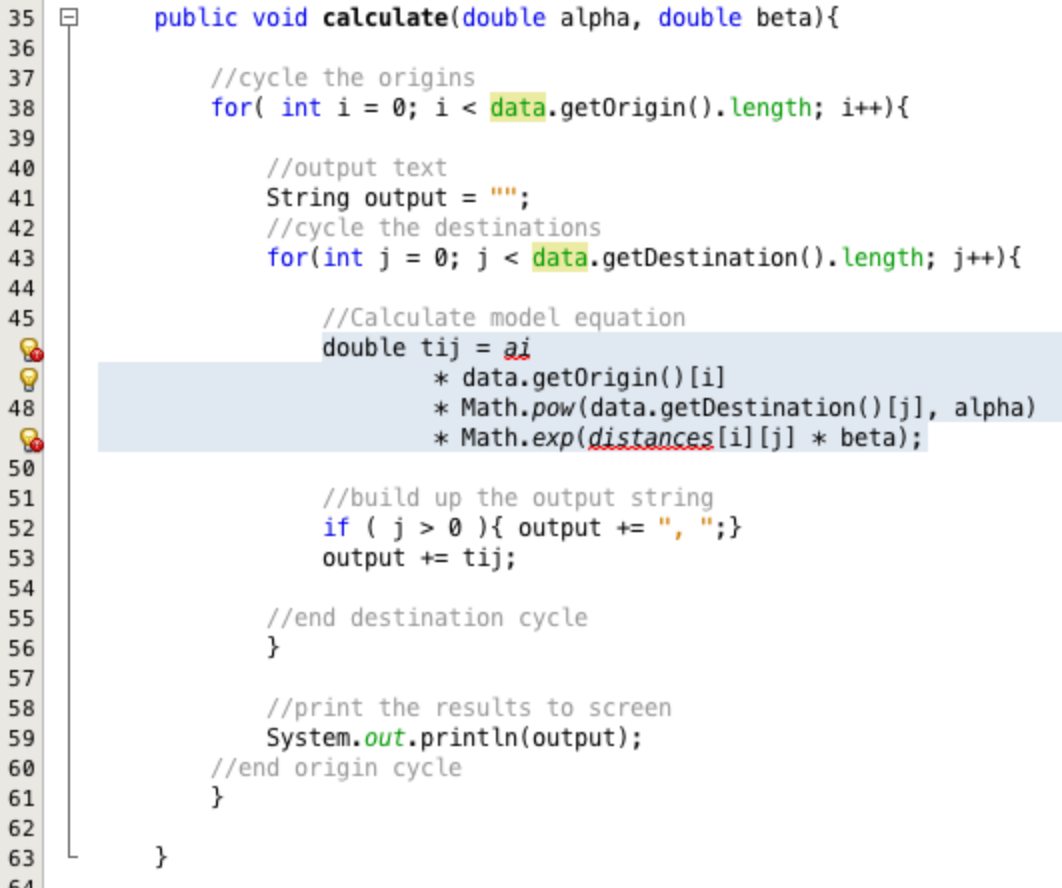
What we are going to do is a little more elegant than that. We will access the data directly from the
data object. We get the array object using data.getOrigin() and then access
the required element using the [i]. So the call becomes data.getOrigin()[i];.
We can use the same approach for both origin and destination values. See Figure 20.
Accessing the distance value is much more straight forward. We changed the accessor so that it returns a single double value dependent on the indexes being correct. However, the index bounds we use to control the loops are not the distance array bounds so we need to check and make sure we are not entering incorrect index values.
To check the index values we can test the distance return value. If it is -1.0 then we know things have gone wrong and to check our input data and we will report this to the screen in a helpful way.
First of all we get the distance value for this origin and destination pair using
double distance = data.getDistance(i, j);. We can test the value and if it is greater than
-1.0 do the calculation otherwise report the failure to the screen. Wrap the equation
in an if(){}else{} to do this. If you get stuck the code is shown in Figure 21.
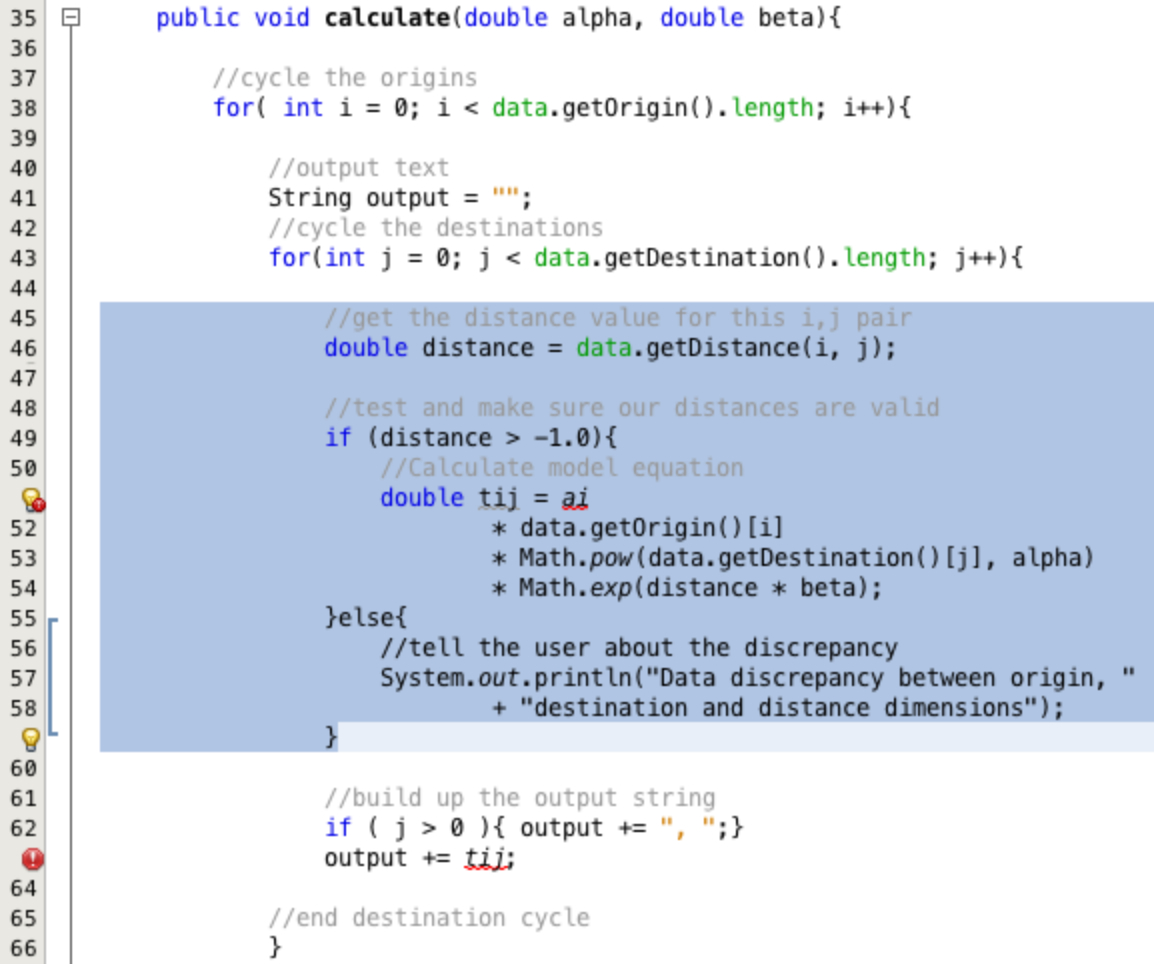
We are nearly there. If you look at line 63 in Figure 21 you will see that we have introduced another
error. This is a scope error. The variable tij is now created inside the if
statement, but we are trying to use it outside of the if statement. The variable only exists
within the brace block where it is created, so by the time the code gets to line 63 the variable no longer
exists.
This is relatively easy to fix but it is important you understand what is going on here. To fix it we can
simply declare the variable above the if block and then use it inside and outside. Alter the
code to move the variable declaration as in Figure 22.
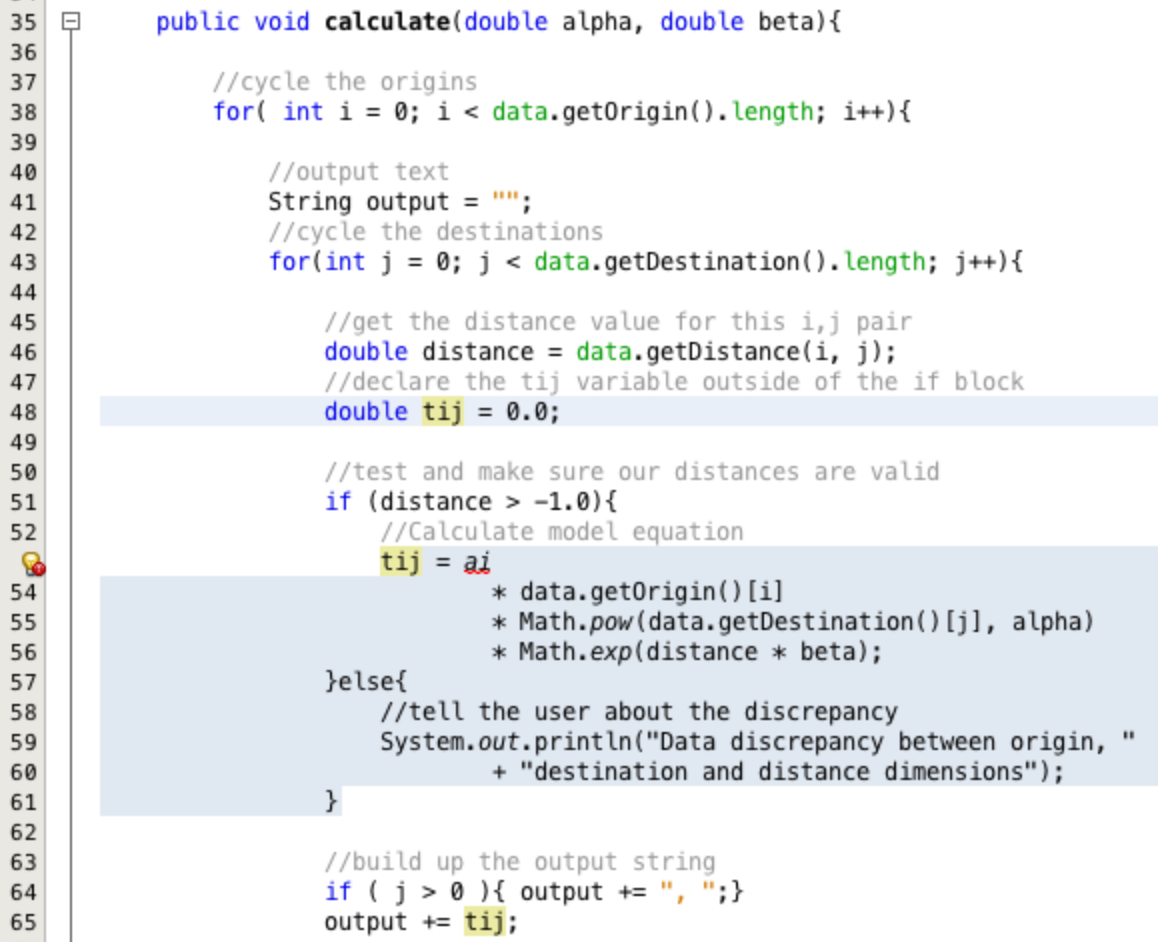
Figure 22 shows that there is only one error left to solve in this section of code. We no longer calculate
the balancing factor in the same scope as the model equation so the ai
variable is no longer available.
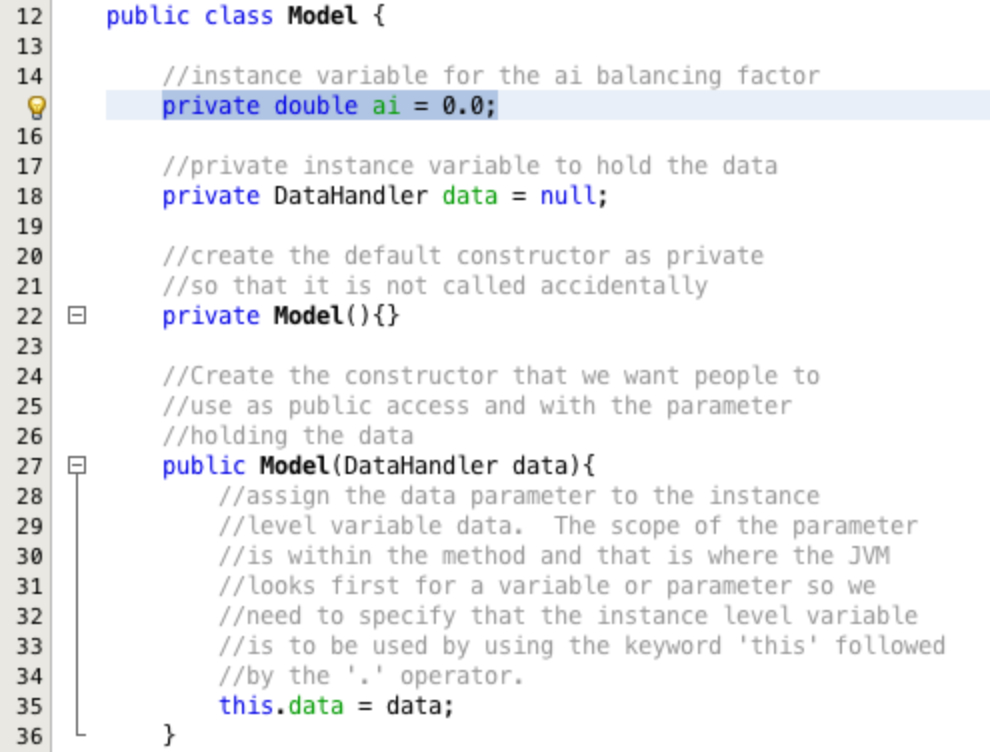
To solve this we are going to create an instance variable for
ai and set this within our balancing factor code. First create an instance variable for
ai of type double with private access as shown in Figure 23.
One problem remains with this solution, the ai balancing factor will always equal 0.0 because
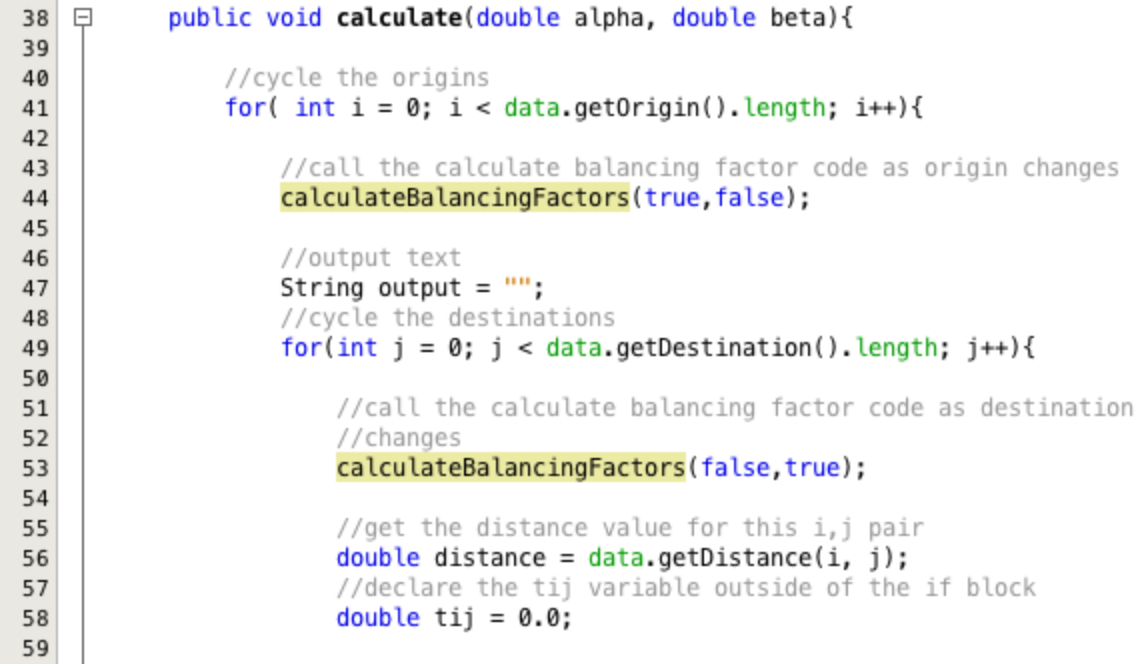
it is never calculated! We need to put some calls in to calculate the balancing factor. Place two calls
to the method calculateBalancingFactors with the parameters configured as shown in Figure 24
Factoring Out Balancing Factor Errors:
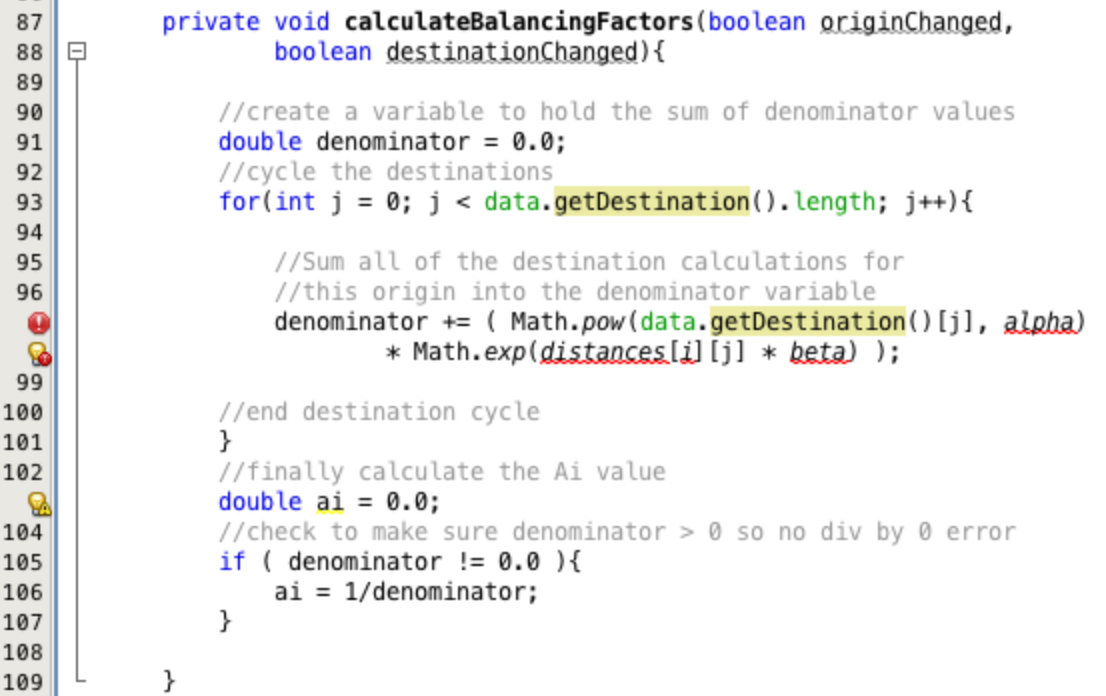
We have six errors in the balancing factor code and the same approach can be use here to fix three of
these as we used in the main model code. To begin with replace the two calls to the
destinations array with data.getDestination() as shown in Figure 25.
We need to access the distance between the origin and destination next. However, we don't know which origin or destination the model is on. The destination is less important in this case, but in other model configurations that too would be required so we will set both. For this reason we will set both indexes so that the balancing factor code can access them.
To enable the balancing factor code to access the current origin / destination in the model code we will
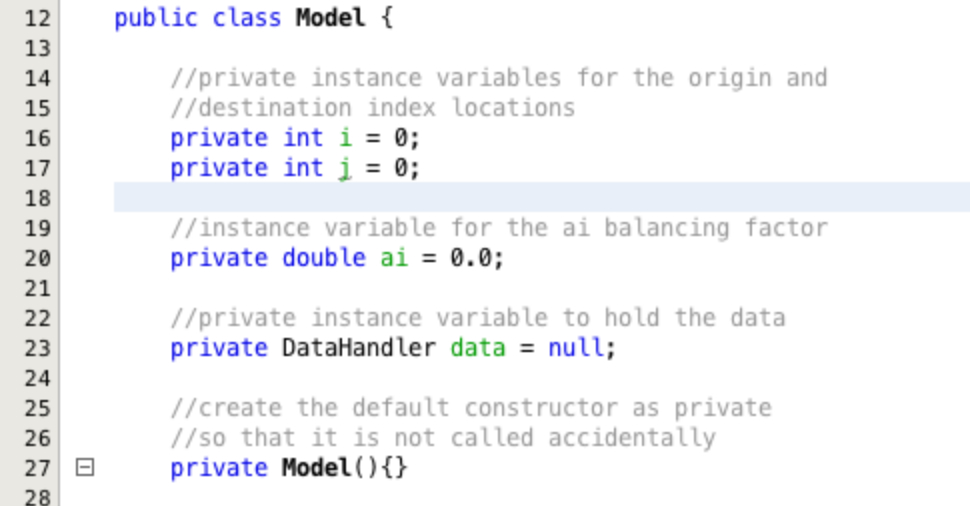
adjust the for-loop counters i and j. First create two instance variables called
i and j with private access and of type int as shown
in Figure 26.
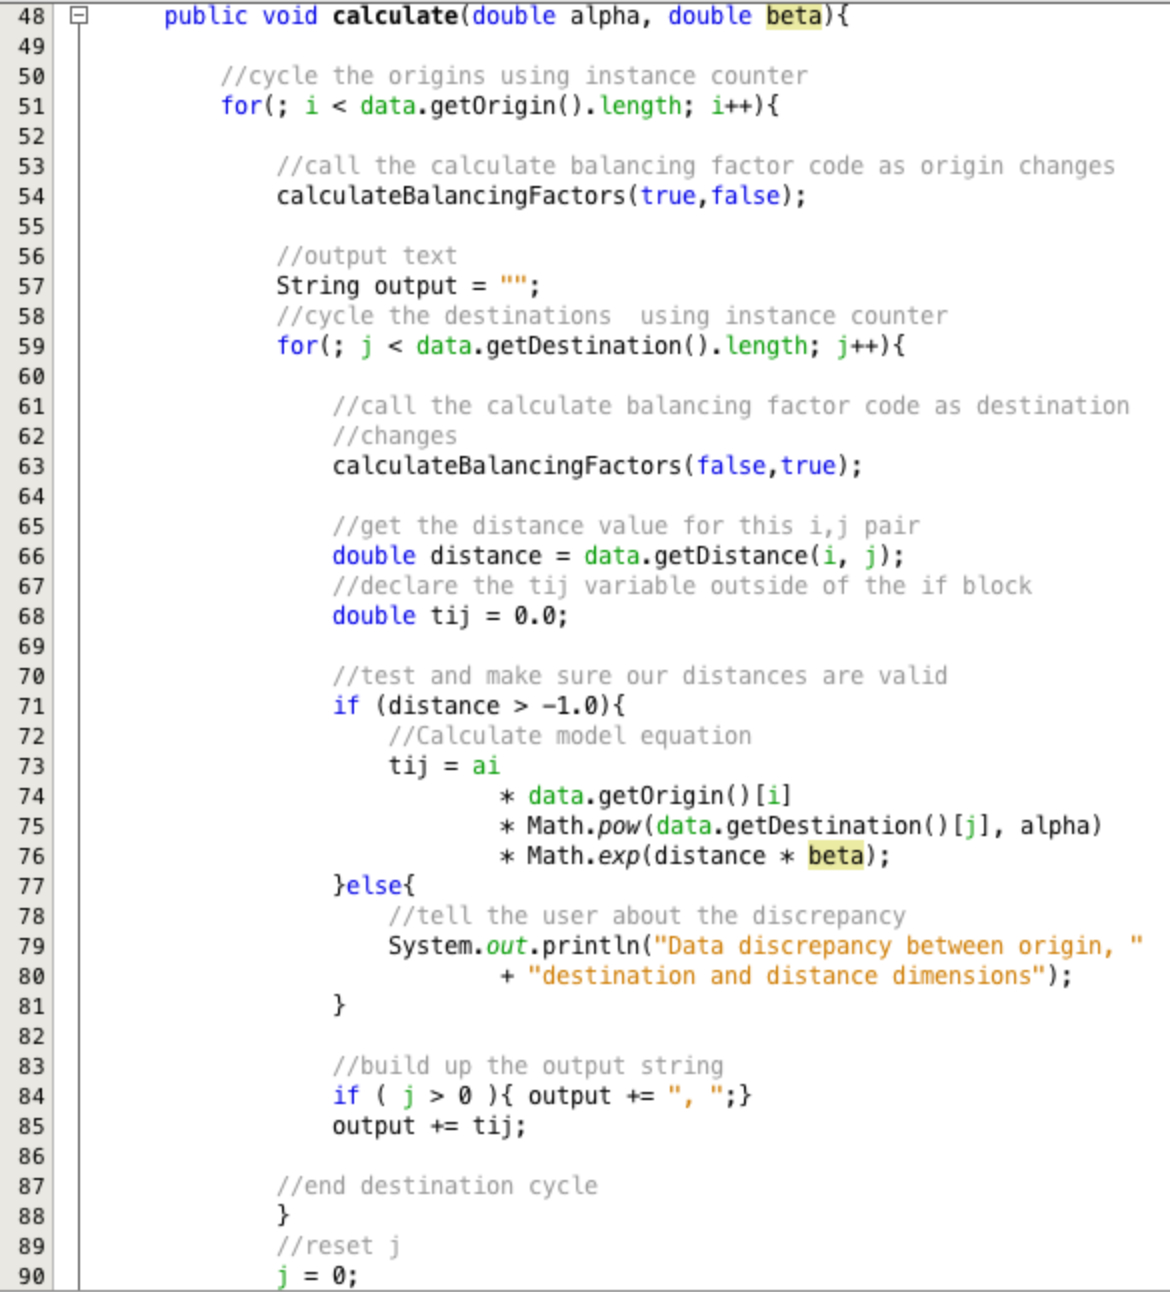
Next the declaration of the i and j for loop counters are removed in the
calculate method as shown in Figure 27. Change the for loops from
for(int i = 0; i < data.getOrigin().length; i++){
to
for(; i < data.getOrigin().length; i++){
and from
for(int j = 0; j < data.getDestination().length; j++){
to
for(; j < data.getDestination().length; j++){
The origin and destination cycles now use the instance level counters instead of creating there own. This means that the index of the origin and destination can be accessed anywhere in the class.
This means that the j value will not automatically reset on each origin cycle. Therefore,
this must be done manually. The code on line 90 in Figure 27 demonstrates this. Insert this line after
the closing brace of the destination cycle but before the closing brace of the origin cycle.
Caution must be exercised in this situation, reading from the i and j
variables is fine, but if we alter their values it will impact on the cycling within the for-loops!
Now the distance can be accessed using the instance level index i and the local destination
index j. Replace the array reference with the accessor for the distance value
data.getDistance(i, j) as highlighted in Figure 28.
We do not need to check the return of the distance value as this is done and any discrepancies reported in the main model equation code.
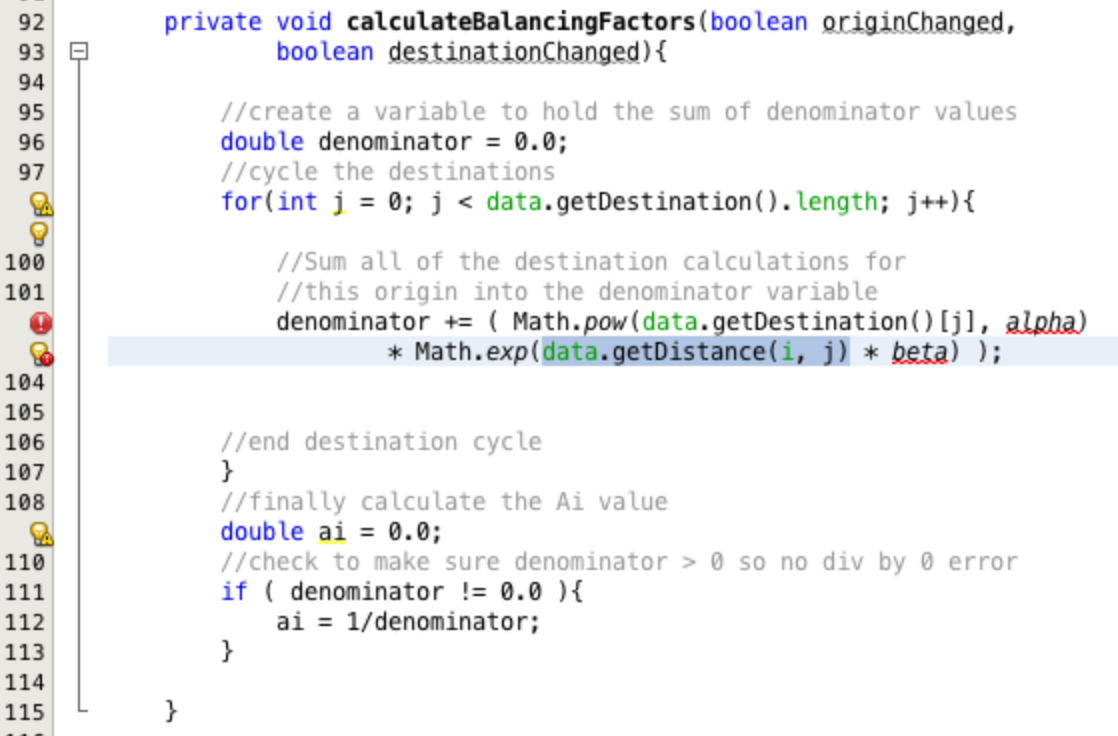
Having a local level and instance level variable j is both confusing
and bad practice, although quite legal in Java. You can specify access to the instance level variable
using the keyword this and access the local variable in the normal way by direct reference.
To keep our code tidy we are going to change the local variable name to jLocal. In the left
hand margin of the text editor you will see a little yellow light bulb, left click on this and you will
see the options similar to the ones in Figure 29 presented. Select Rename the local variable.
You can then type in the new variable name jLocal and the variable name will be changed
throughout the method. When you have finished typing the new name press enter.
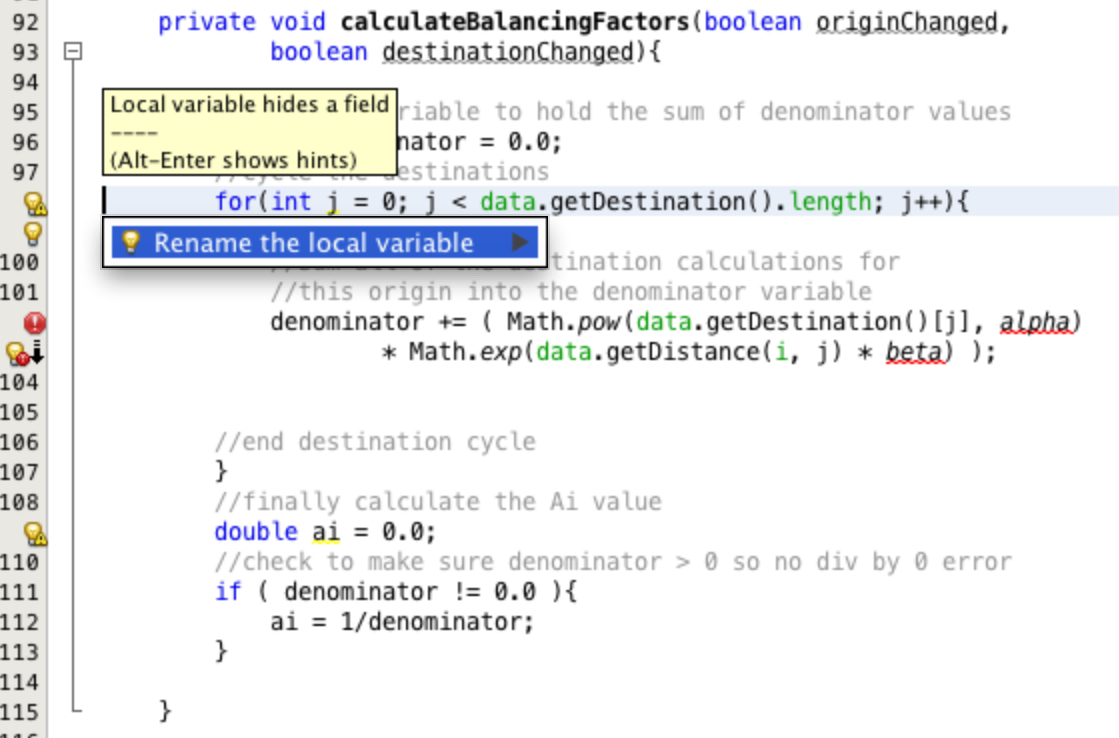
There are two alterations left to do in this class.
- Make the
alphaandbetaparameters accessible to the whole class. - Make the
aivariable accessible to the whole class.
We have already created an instance variable ai. The only change we need to make is to delete
the keyword double from the highlighted line in Figure 30 removing the declaration of a local
variable. The balancing factor will now be stored in the instance level variable.
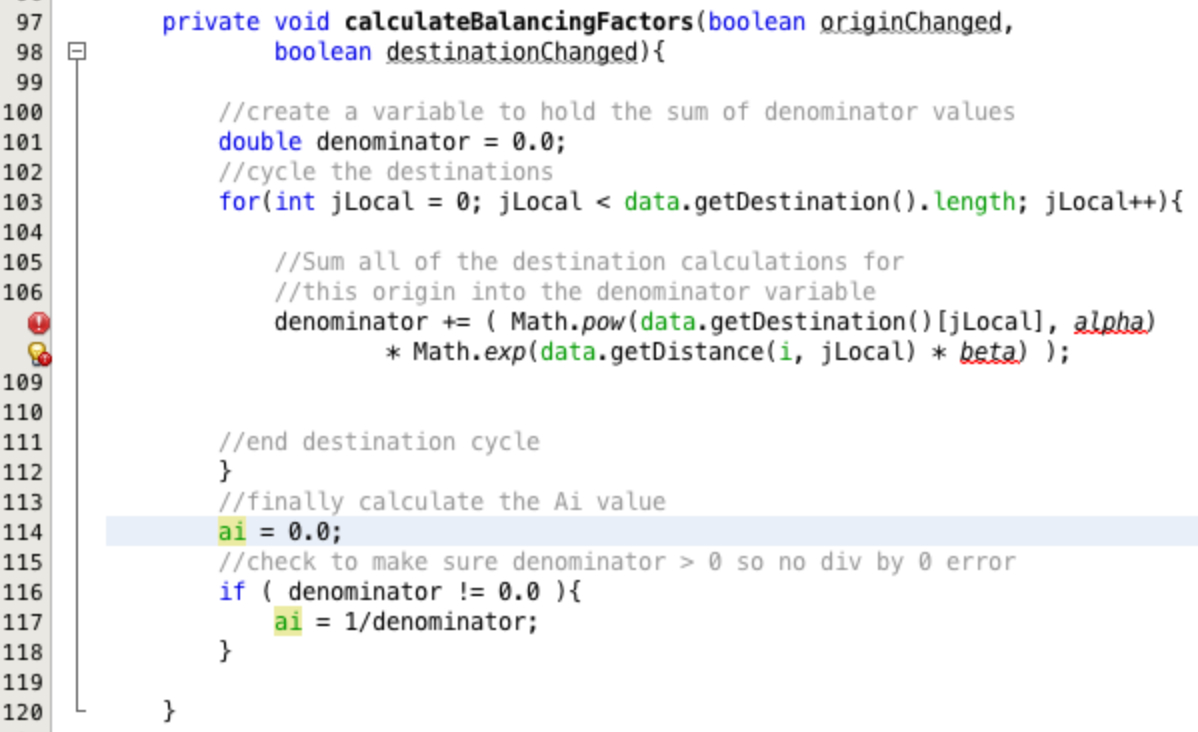
To make the alpha and beta parameters class level we first need to create two instance variables to hold
the values. Create two private instance level variables of type double, one
called alpha and the other called beta as shown in Figure 31.
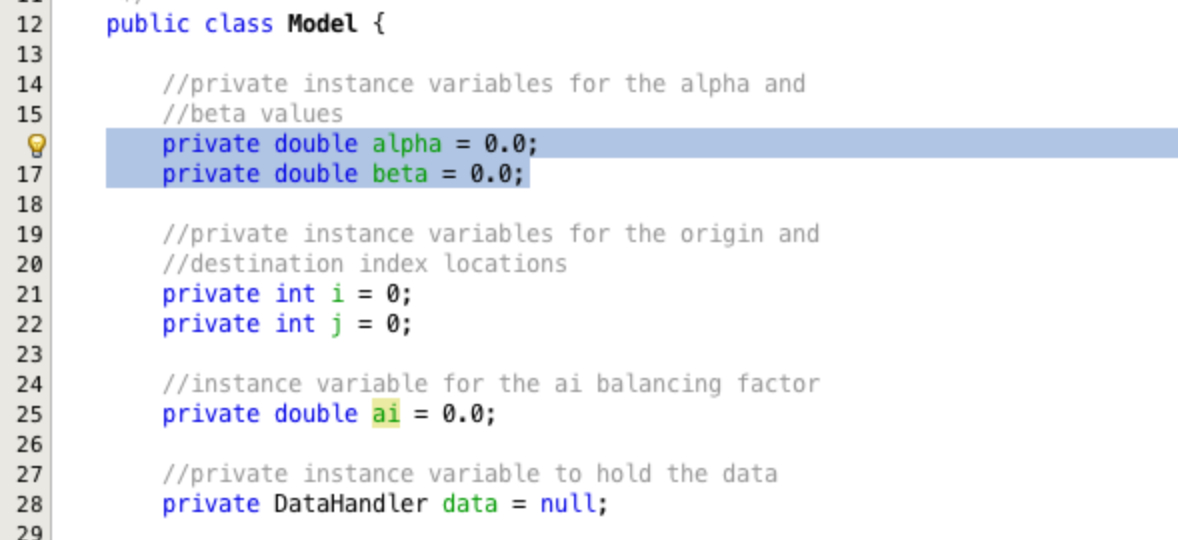
In the method calculate when the alpha and beta parameters are
passed in we simply assign them to the class level variables we just declared, Figure 32. The keyword
this is used to specify which are the instance variables.
We have now refactored our classes.

Running the Refactored Model:
To run the refactored model we need to add a few lines of code to the main method in the
SpatialInteractionModel class.
Below the equation parameters create a new instance of the DataHandler class
called dh. Call the loadData() method on the new DataHandler object
dh.
Below these lines create a new instance of the Model class called
model using the dh object as the parameter. Finally, call the
calculate method on the object model passing in the alpha and
beta parameters.
Once you have done this your code should look like that in Figure 33. You can now run the model by right
clicking on the SpatialInteractionModel class in the project area and selecting
Run File as you did previously.
Note: the results from running the refactored model with the same parameter configuration will be the same as running the code at the beginning of the practical. It is the structure of the code that has been altered not the functionality.

Summary:
- A class should have a well defined purpose, a specific job to do.
- The process of adjusting code to make it more elegant and flexible is called refactoring.
- Classes are further broken down into sections of code called methods.
- Methods are small sections of code that should be easy to read and understand.
- Structuring code into classes and methods de-couples different tasks.
- De-coupling of tasks facilitates good design and more code re-use.
- Constructors are a special kind of method called when a new object is made from the class.
- Both constructors and methods can be parametrised.
- Both constructors and methods can have access control keywords applies
private,publicorprotected. - A method can be declared as
staticbut a constructor cannot. - Intelli-sense are the popups that appear to assist with finding methods belonging to a class or object.
- Netbeans has several functions to assist with refactoring code, many of these are found in the Refactor menu.