Basic Agent-Based Modelling and Inheritance
[Practical 6 of 11 - Part 2]
Adding a User Interface:
Create a new class in called UserInterface. Extend the MASON class GUIState using the
line extends GUIState after the class declaration. Add the import sim.display.GUIState;
when prompted by the IDE.
Create a default constructor for the class and call the super class constructor from within the default
constructor passing in a new instance of BasicAgents and using the current system time for the parameter.
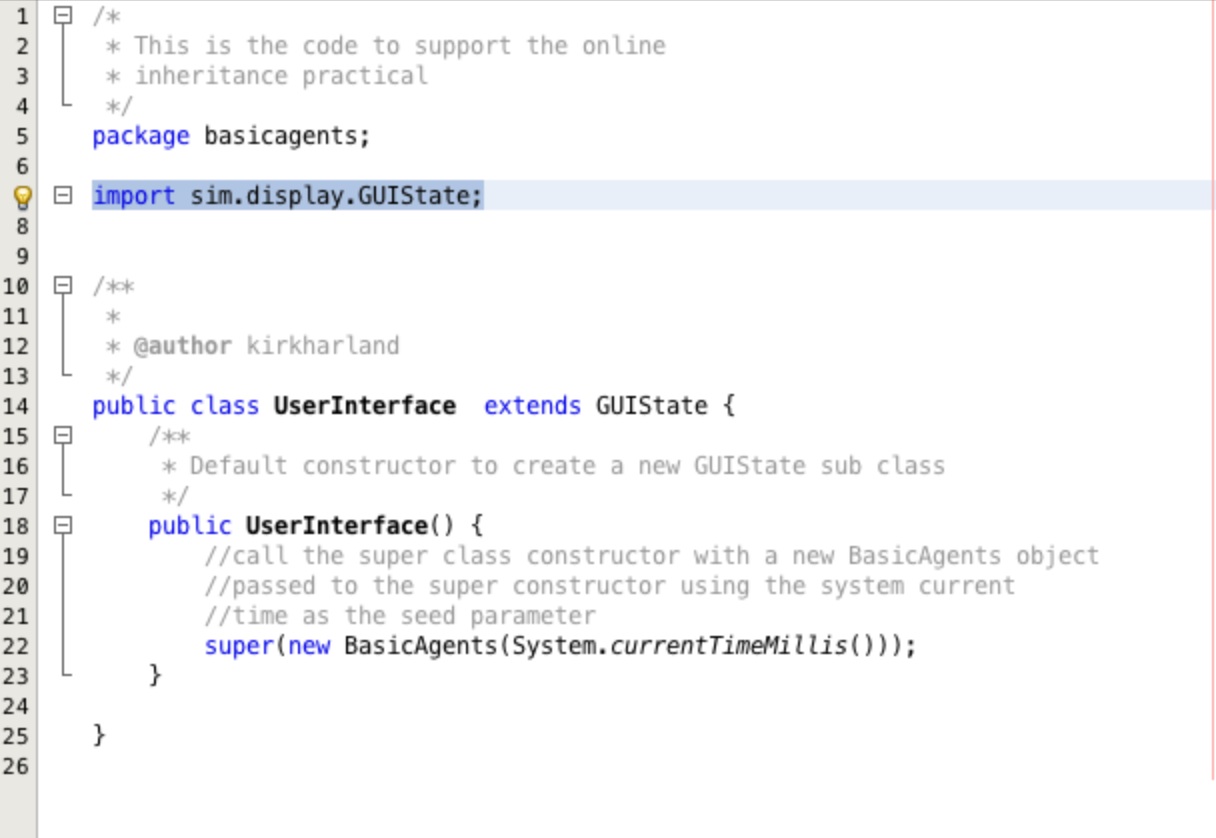
Add the code shown for the main method and the getName() method as shown in Figure
15. This code creates a basic control console for controlling things like the speed of the model, starting, stopping
and reseting the model.
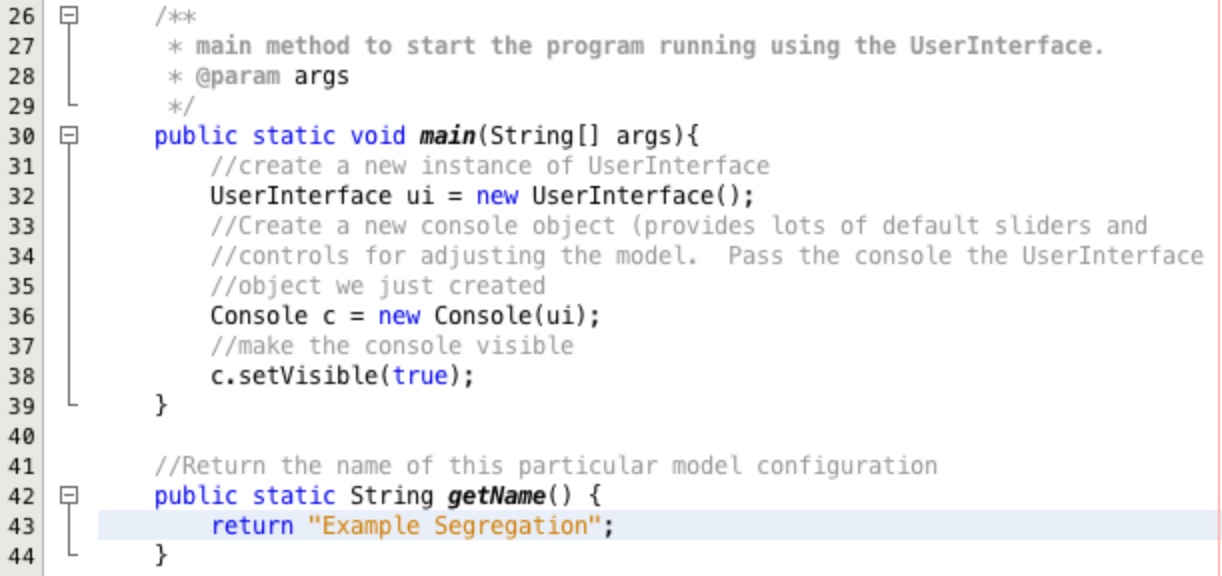
Running the model by right clicking on the UserInterface class and selecting Run File will launch
the screen shown in Figure 16. All of this user interface functionality has come from the inherited code in
the MASON toolkit.
We can start and stop reset the model now using the interface but we still don't have any visualisation...
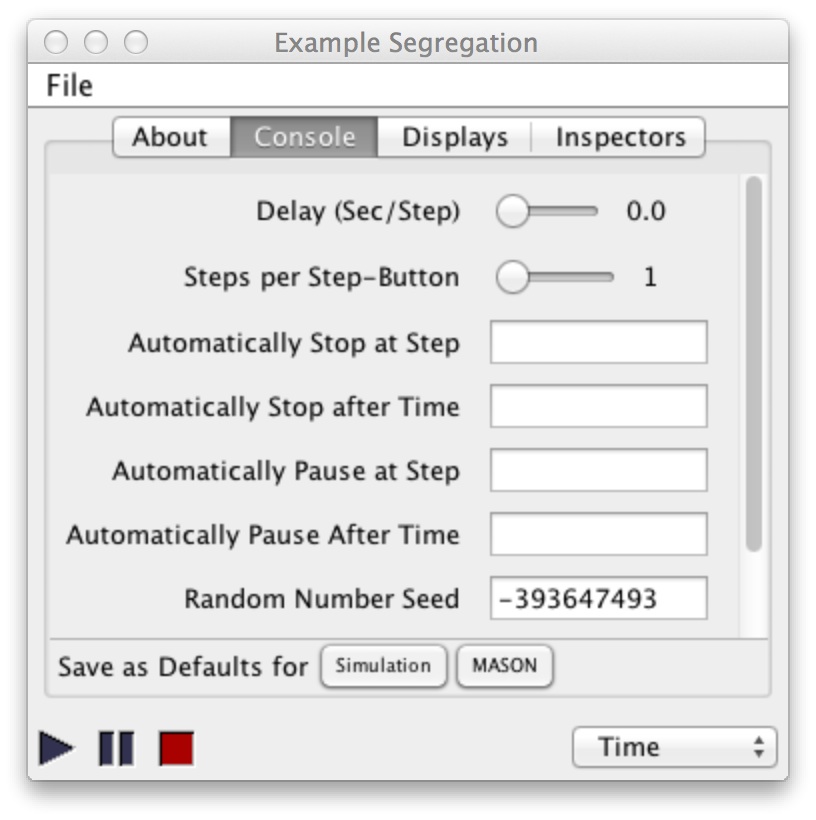
Add the three instance variables shown in Figure 17 and the list of imports that will be required to create the next stage which is to display our agents on the screen.
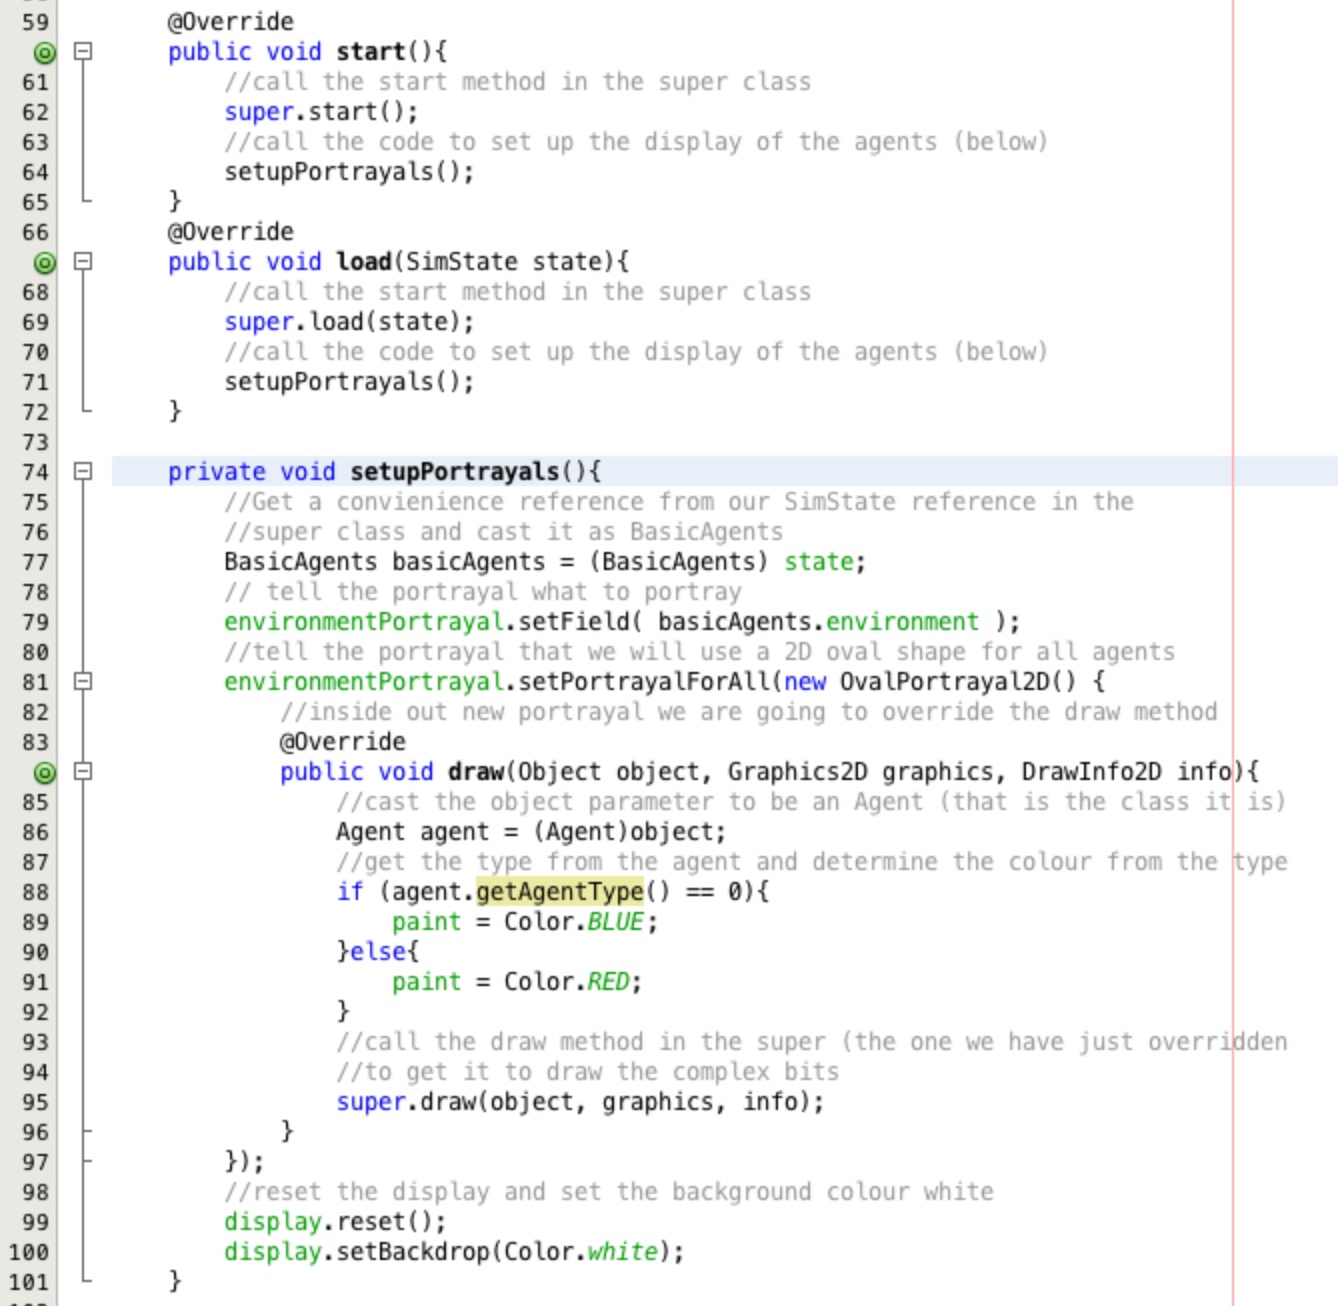
Add the three methods (start, load and setupPortrayals) and associated code
shown in Figure 18.
The start and load methods need to be overridden so that we can all the
setupPortrayals method when we load or start the model running. The setupPortrayals
method tells the display how to display the agents.
The code after the new OvalPortrayal2D() overrides the draw method inside the
OvalPortrayal2D class allowing us to change the colour of the agents based on the type they have been
allocated. This is a complex piece of code and may take time to understand exactly what is happening here.
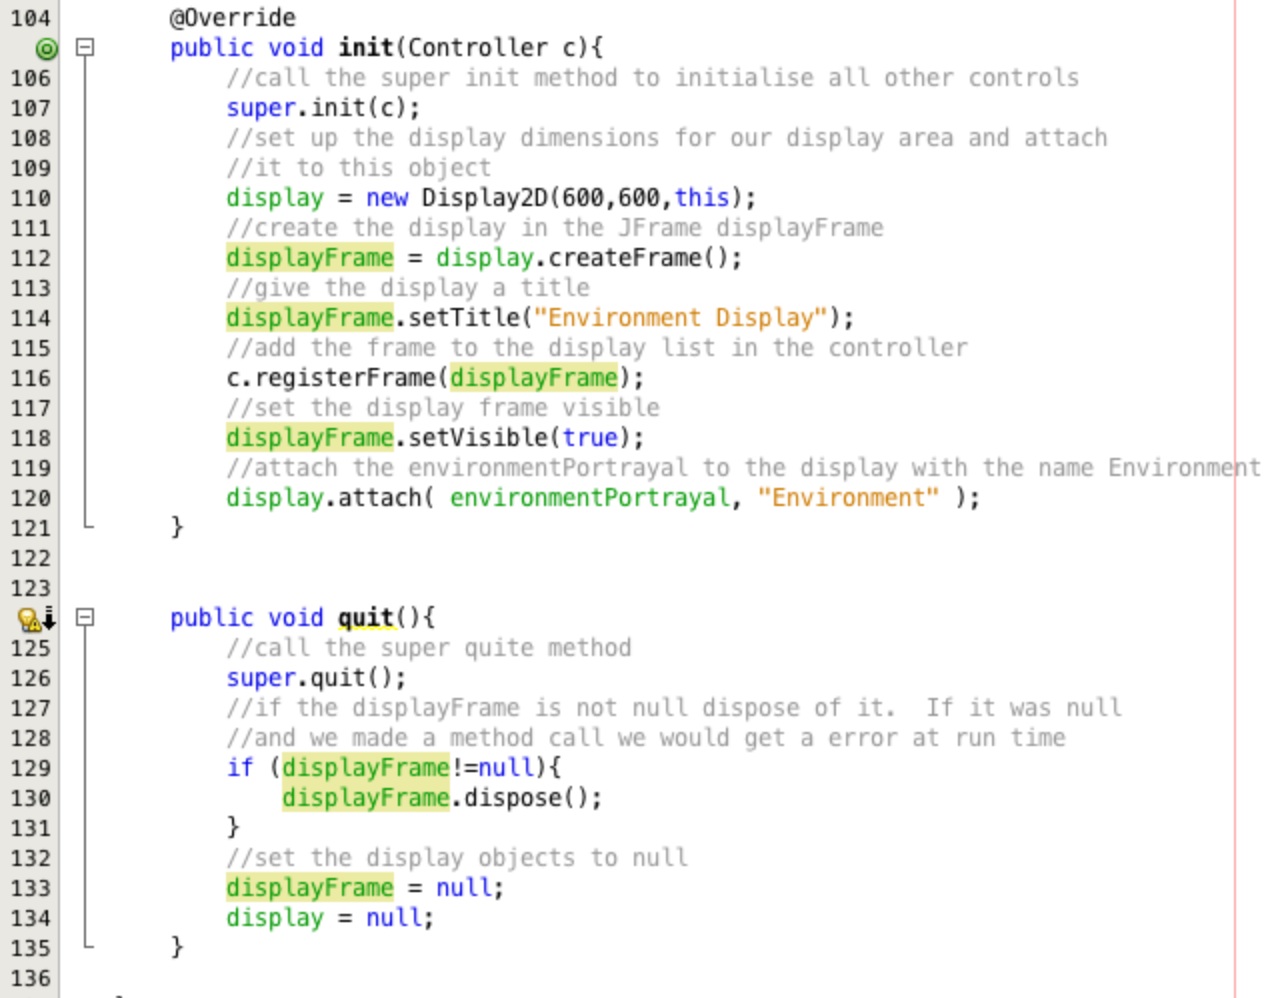
Finally to attach the new display to the model and console add the two override methods init and
quit as shown in Figure 19. When prompted to import sim.display.Controller;.
These two methods attach the display to the relevant objects and set it visible in the init method and
set release all of the references when the model is closed.
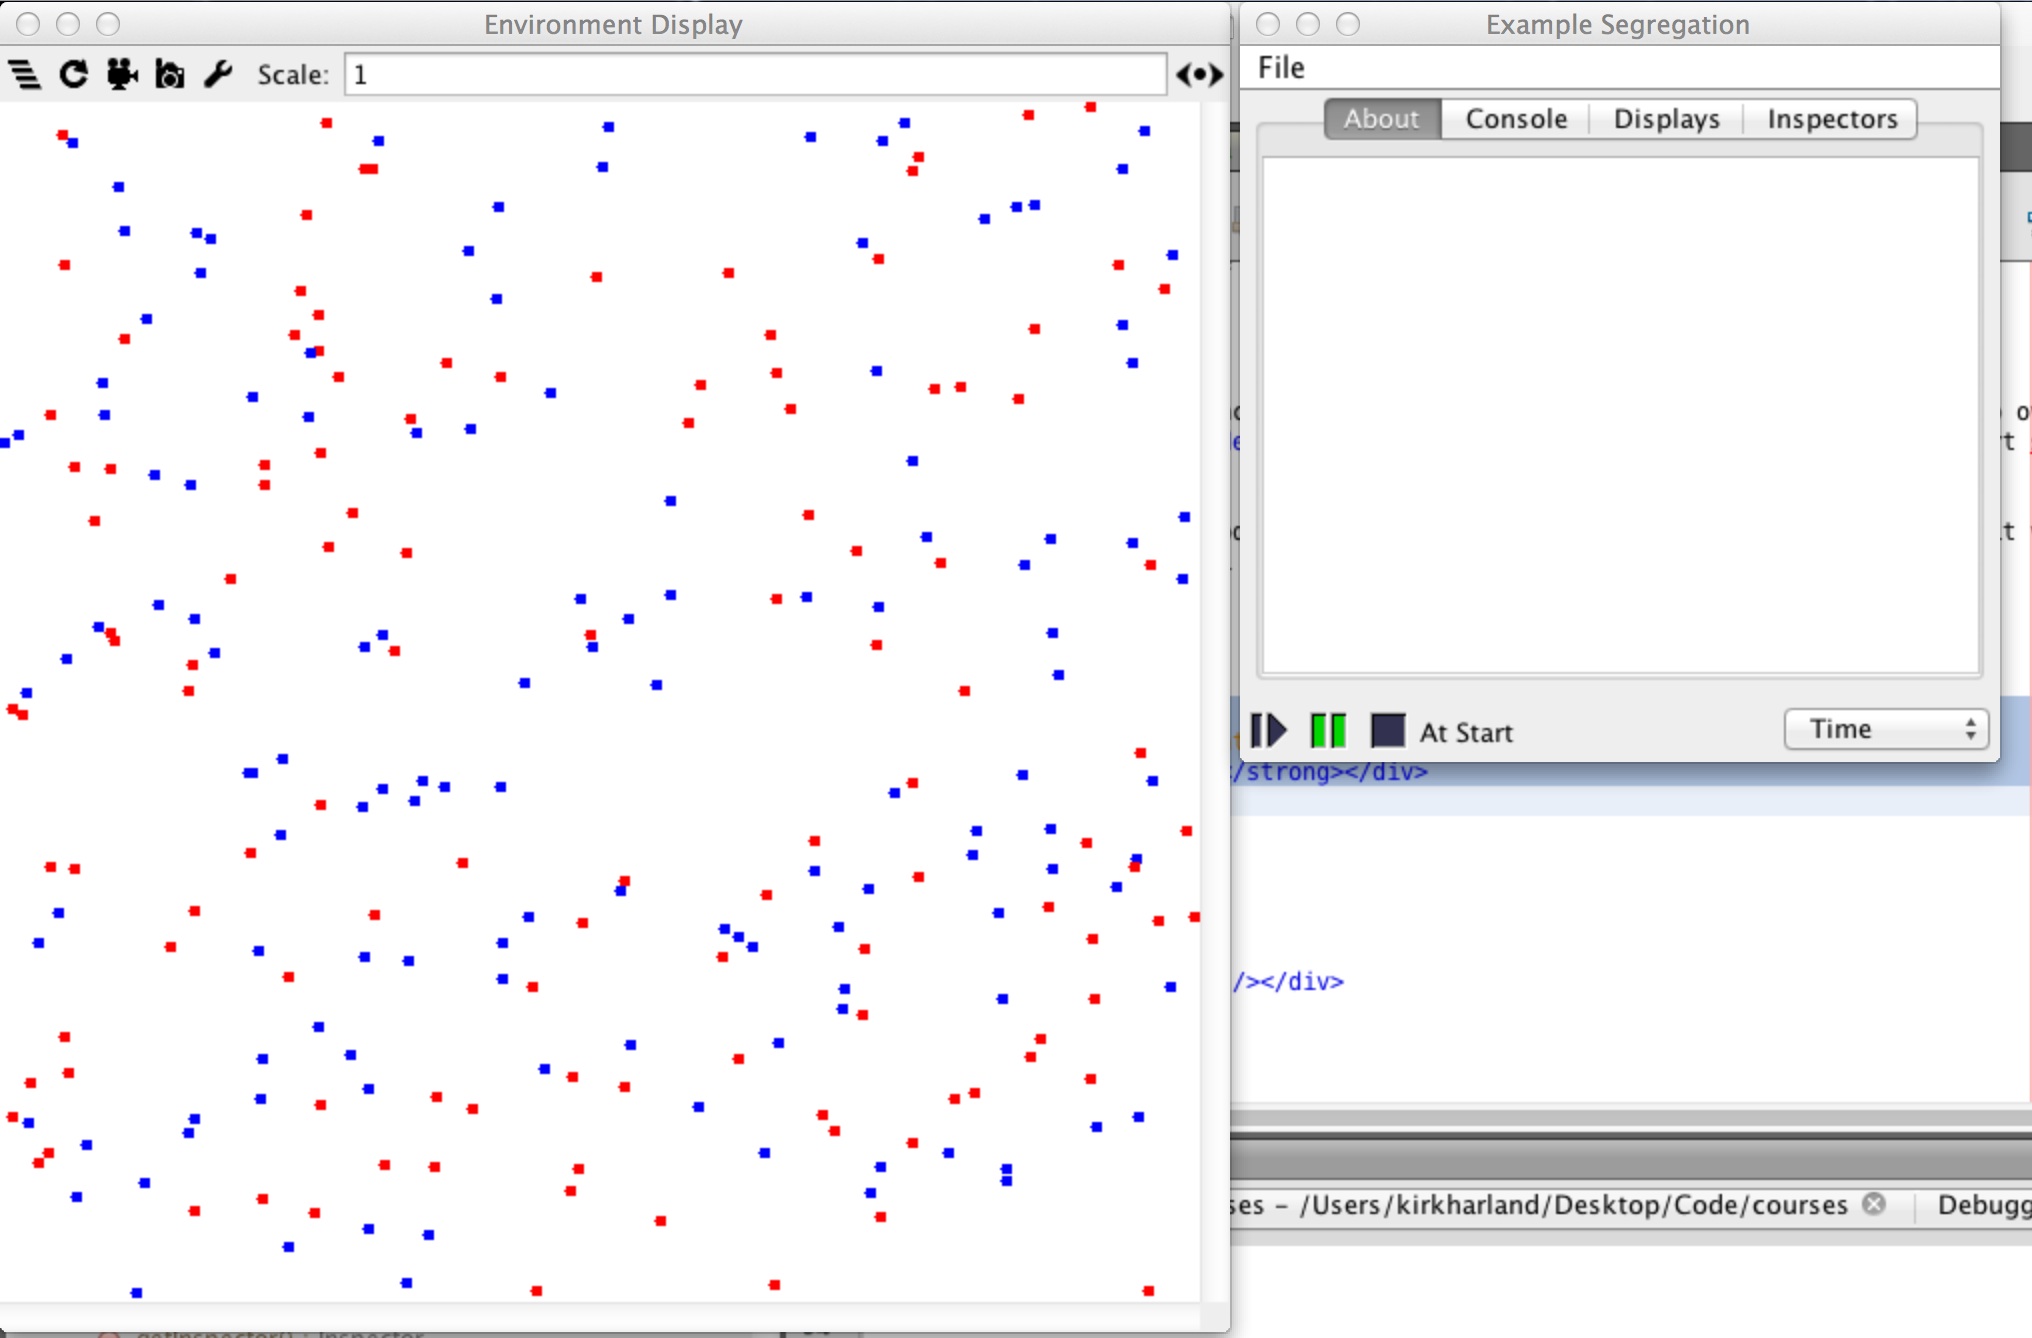
Running the UserInterface class now will provide you with a console screen and also a display area. Click
on the pause button to get the agents to be setup and displayed as shown in Figure 20. Clicking the
pause, slow motion, stop and play buttons will allow you to control this ABM through the toolkit supplied in MASON.
You can also control the speed and various other aspects of the model through the Console tab. Additional functionality for recording movies and images of your model mid run can be accessed through the display screen. Have a play with the buttons and read about MASON in the manual and online to get a better understanding of the interface.
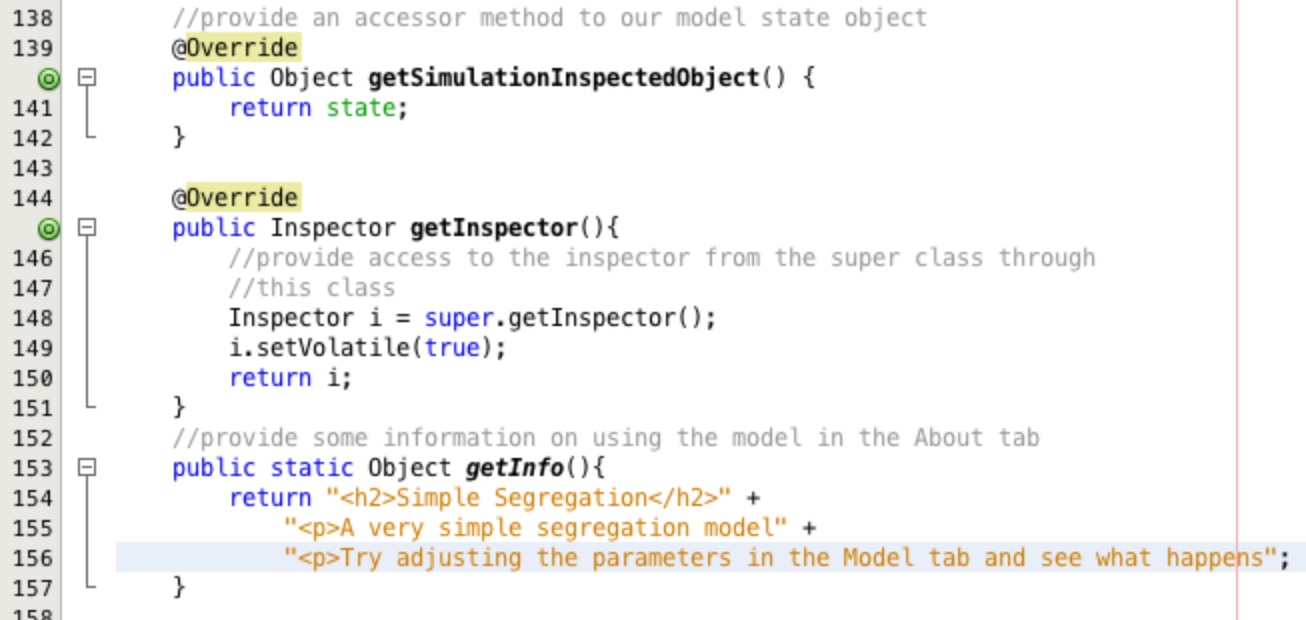
This is fantastic progress but we can't change any of the parameters in our model. To do this we need to add a few final
methods. Add the methods as shown in Figure 21 and add import sim.portrayal.Inspector; when prompted to do so.
Start up the model again and run it, now you can vary the model parameters at run time through the interface!
Summary:
- This practical has demonstrated that with relatively little code we can produce smooth and powerful models by using code provided for us by third parties.
- Inheritance proves a powerful tool when using and adapting other peoples code.
- Overriding methods allows us to implement bespoke functionality while maintaining the use of the default code.
- The key word
superallows us to access instance variables, methods and constructors in the class from which we inherit. - Interfaces provide a contract for us to implement certain methods but they do not supply any code.
- classes whether abstract or not are inherited using the keyword
extend.